How to Organize Your Branches
Order rules by the Waterfall Method
Branches are evaluated one at a time from the top-down, adhering to the Waterfall Method. Learn how to take advantage of this evaluation process to create the most efficient Branches.
The Waterfall Method is a sequential design process used in software development in which progress flows from the top to the bottom, like a cascading waterfall. Wordsmith Branches adhere to this methodology, which means that the rules you write in a Branch will be evaluated from the top-down in order. You can customize the number of rules you would like written if they are true. Once that rule number is met by true rules in your Branch, the process stops and no further rules are evaluated.
Write one rule in a Branch
You have the ability to customize how many true rules in a Branch you want to write. The default is just one, which means Wordsmith will evaluate each rule adhering to the Waterfall Method and write the first rule that is true.
For example, if the rule 1 is true in a Branch, then the text written for that rule will be included in your Wordsmith narrative. If rule 1 is false, then the second rule will be evaluated.
If the rule 2 is true, then that text will be included. If rule 2 is false, then rule 3 will be evaluated. And so on and so on, until all rules have been evaluated.
If none of the rules you’ve written are true, then whatever text is in your default rule, or the "Add text if no rules are true" box, will be written in your Wordsmith narrative. And if there isn’t any text in your default rule, nothing will be written.
Because Branches adhere to the Waterfall Method, there are ways you should structure your Branch to correctly display the text you want and keep your logic as simple as possible.
- List rules with the most rare scenarios at the top of the Branch since they will be evaluated first. Rules further down the Branch will be more general because you have already accounted for the more specific scenarios.
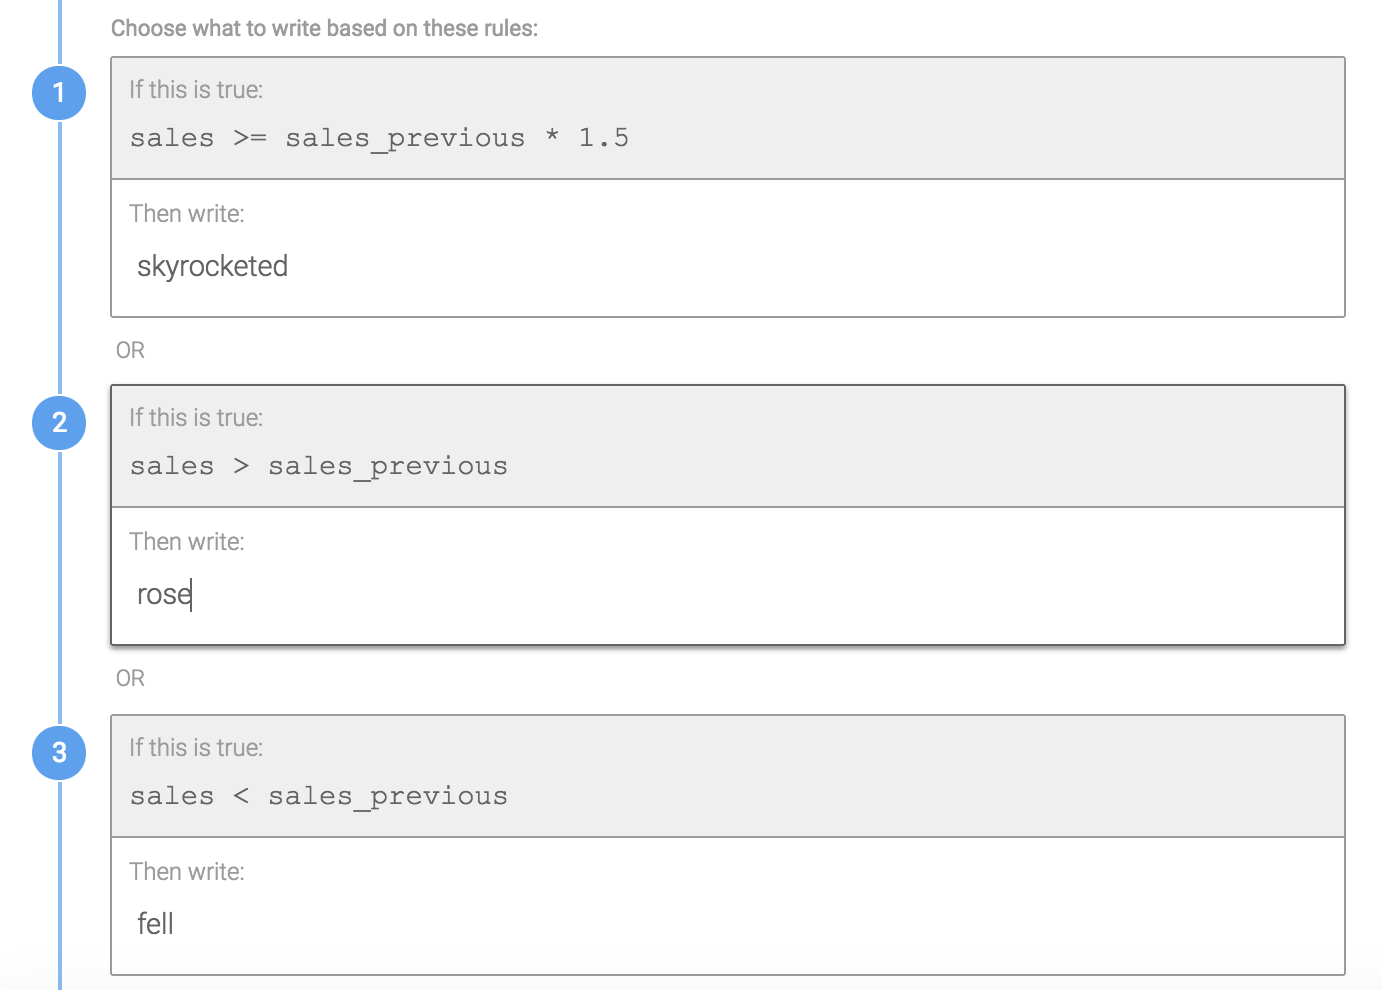
The first rule in the Branch is the most rare, that sales would be greater than or equal to 1.5 times the previous sales.
- Do not include the false statement for rules that were evaluated earlier in the Branch. These are unnecessary because you know that the previous rules evaluated before had to be false.
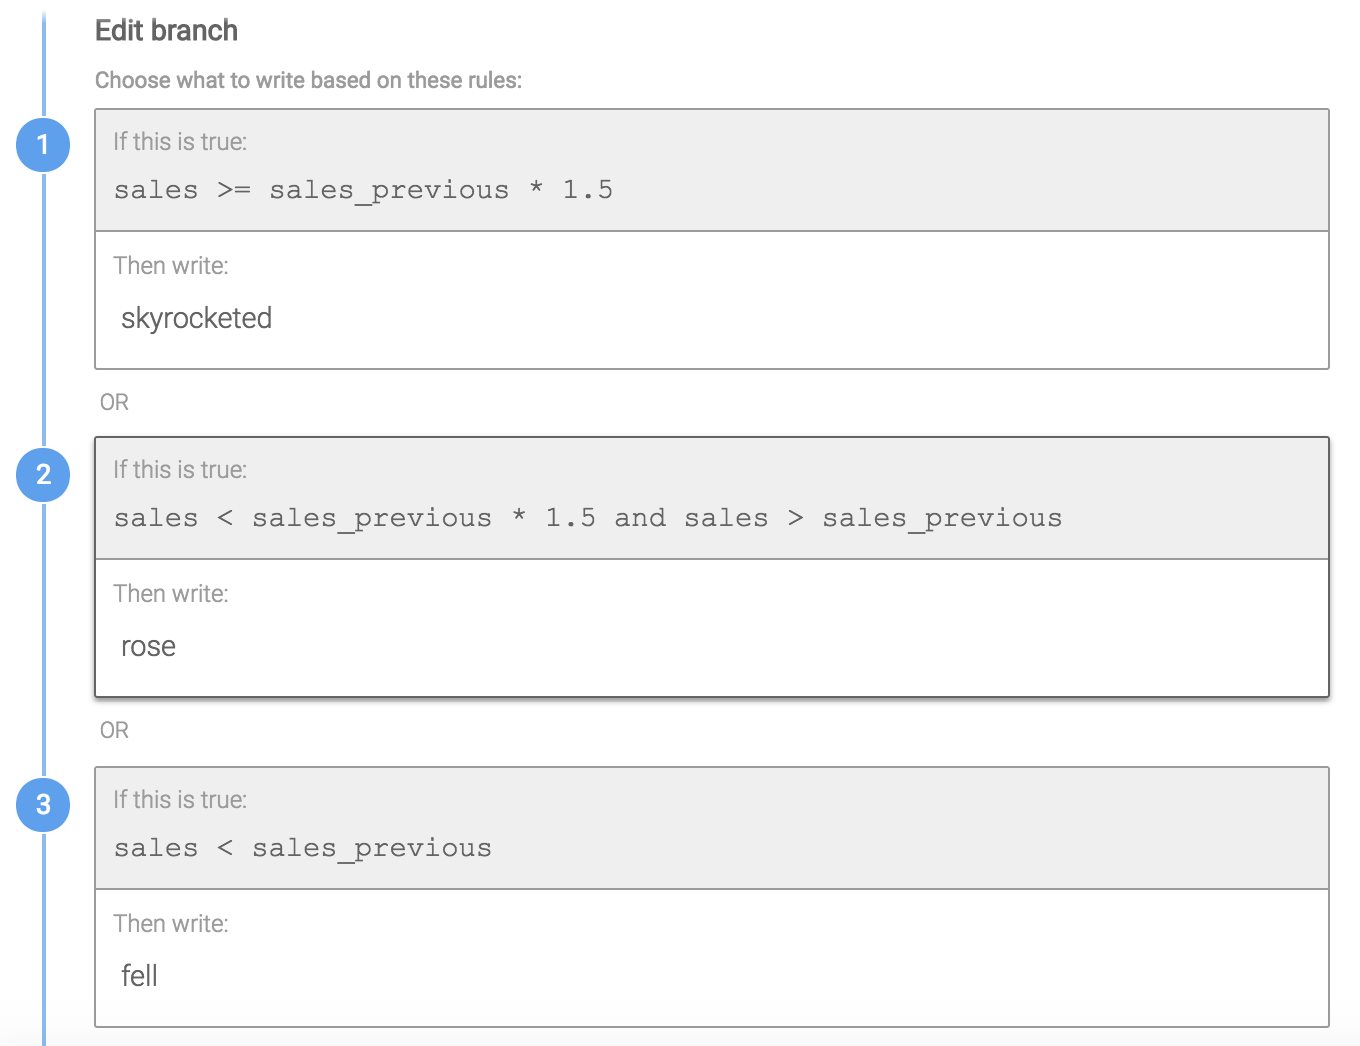
The second rule in this Branch includes the false statement for the first rule (sales are less than sales previous multiplied by 1.5). You do not need to include that argument because in order for the second rule to evaluate as true, the first rule must have already evaluated as false.
Write multiple rules in a Branch
You can customize your Branches to write more than one rule that's true. If you have multiple statements you want to write in the same sentence or in a bulleted list, you can select the maximum number of rules to write or write every one that's true. You even have the ability to customize how those rules are written in your narrative: they can be separated by a comma or a line break.
For example, if you wanted to list out features of a product only if those features met a certain condition in the data, like a TV with a specific resolution or 3d capabilities, you'll write rules for those data conditions in the Branch and customize the Branch to include the first three true rules or all true rules. When you write multiple true rules in a Branch, you'll see the option to separate those rules with a comma, a line break, or nothing. And if you select a comma, you can choose the conjunction to separate them and if you want to include an oxford comma.
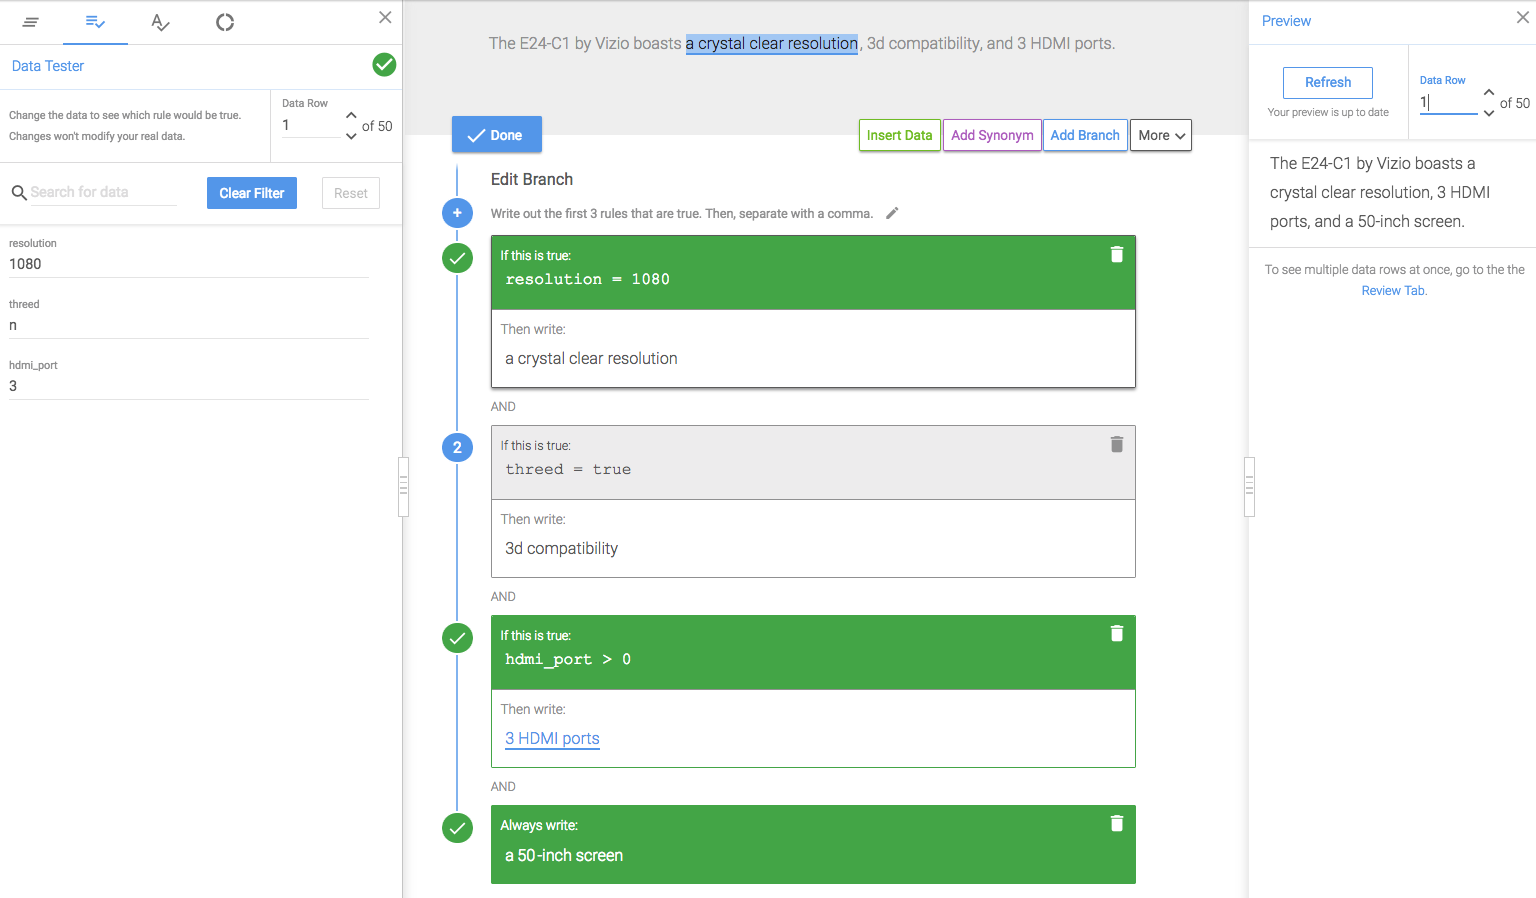
In this example, we'll include the first 3 true rules. The default rule describing the screen size will always be written and be included in the maximum number of 3 rules. As you cycle through different rows of data, you'll see the narrative change based on what features are included for that product.
You could also include these features in a bulleted list. Select Line Break instead of a Comma to separate the rules.
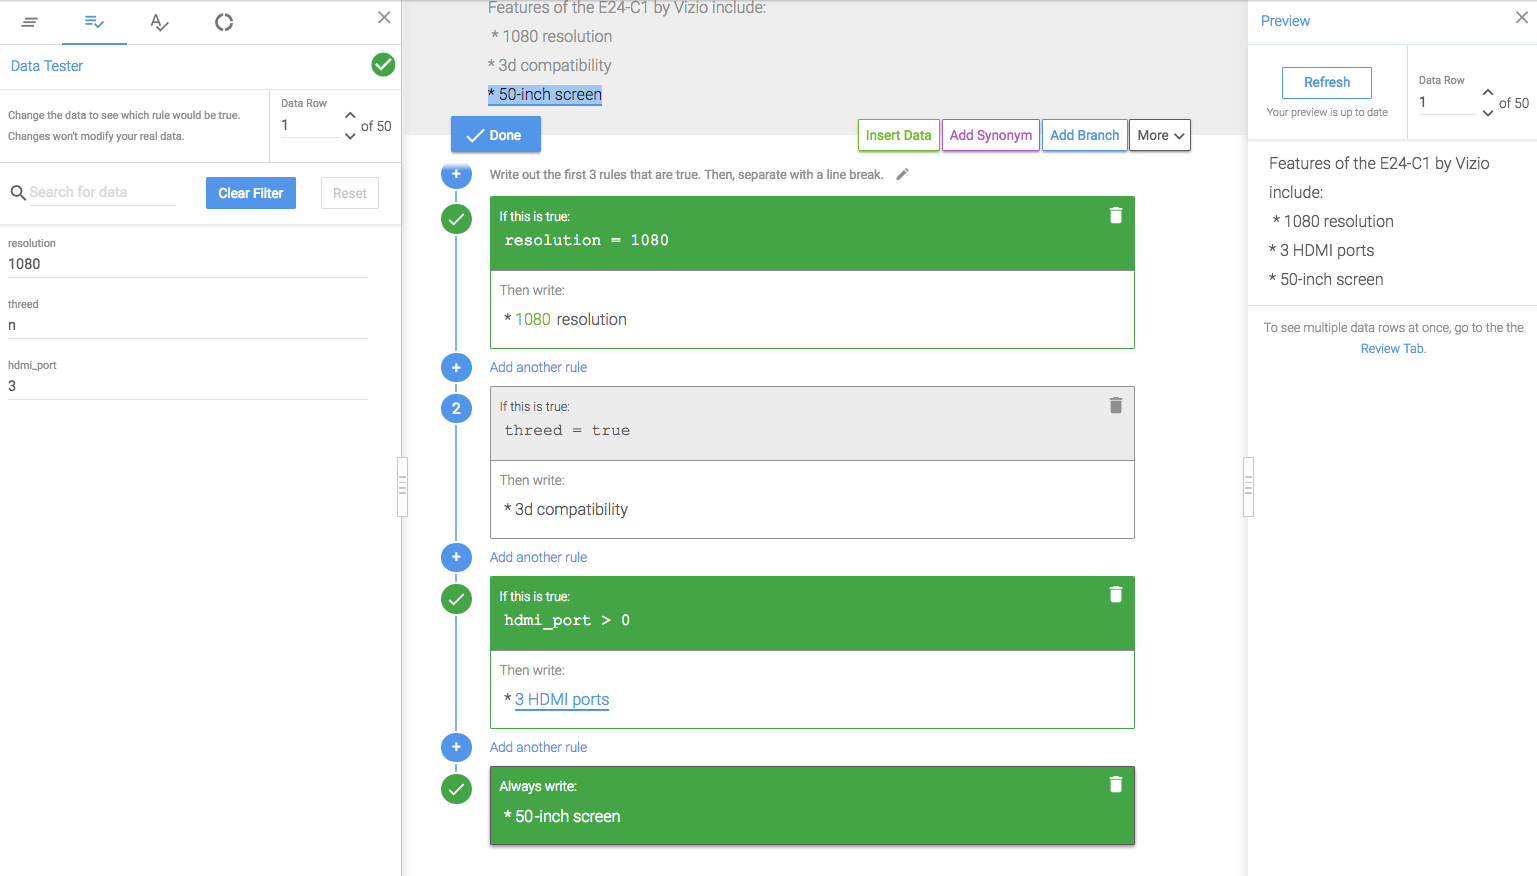
When using the option to write out all rules that are true in your branch, make sure you take into account your default rule settings.
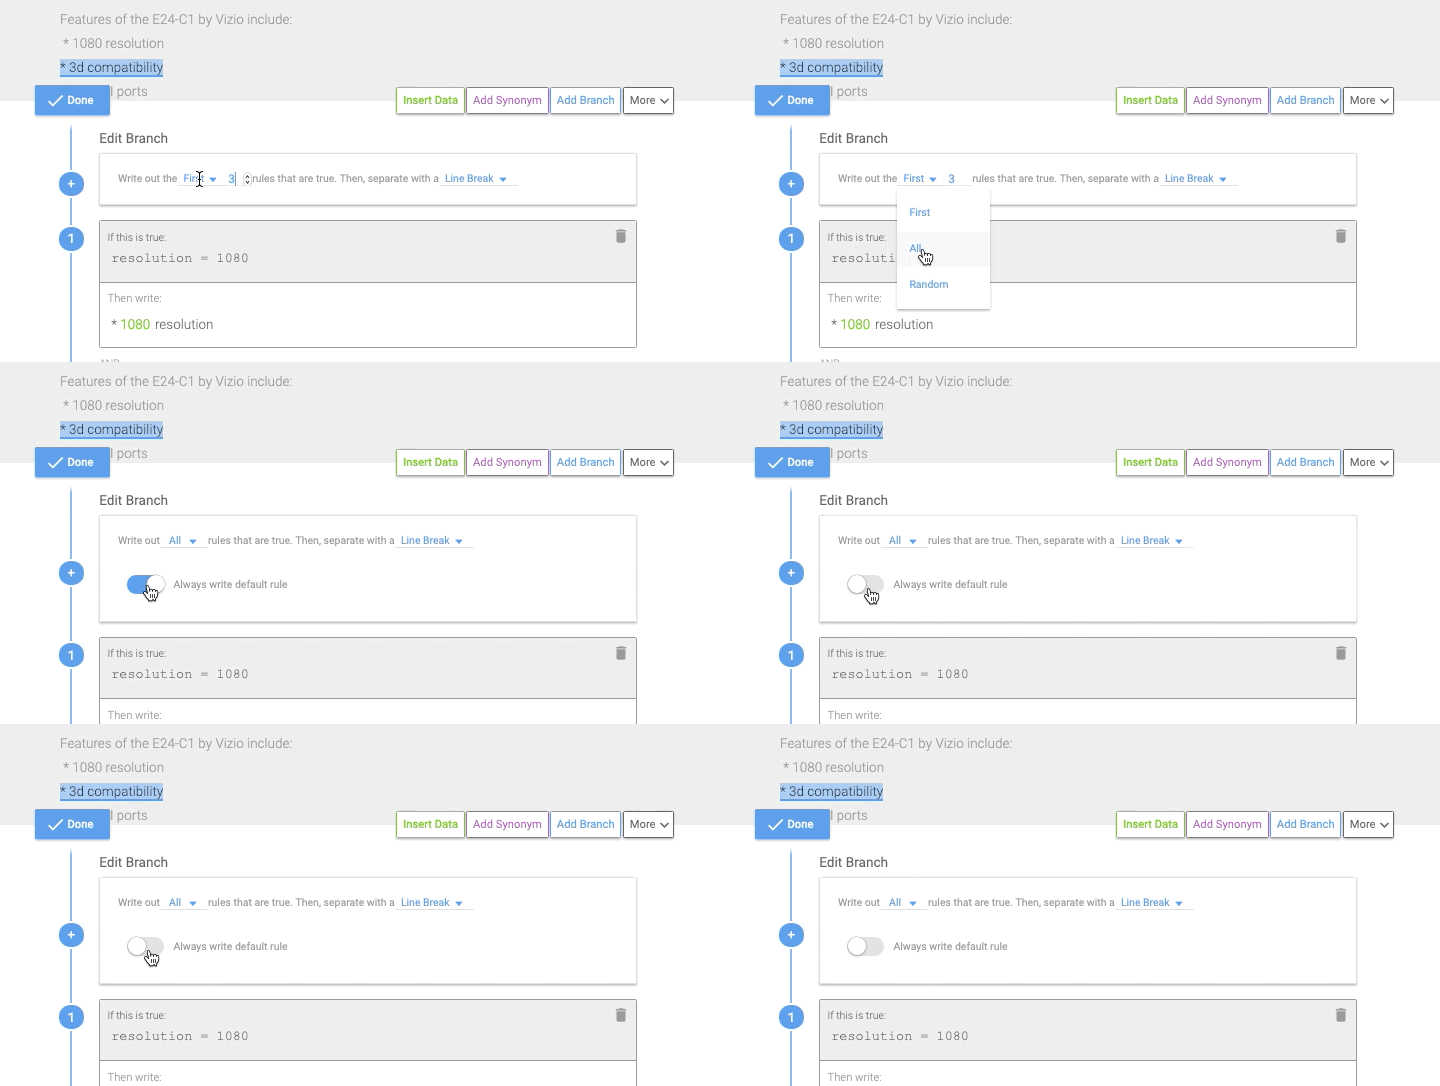
You can adjust this setting using the toggle switch in your branch rule options.
In some cases you may want to use the “Always write default rule” option, for example, if have a bulleted list with some items that are not based on conditional logic, you could use the default rule to write and list those items in every narrative so that your bullets and line breaks all stay organized even if no other rules in the branch are written.
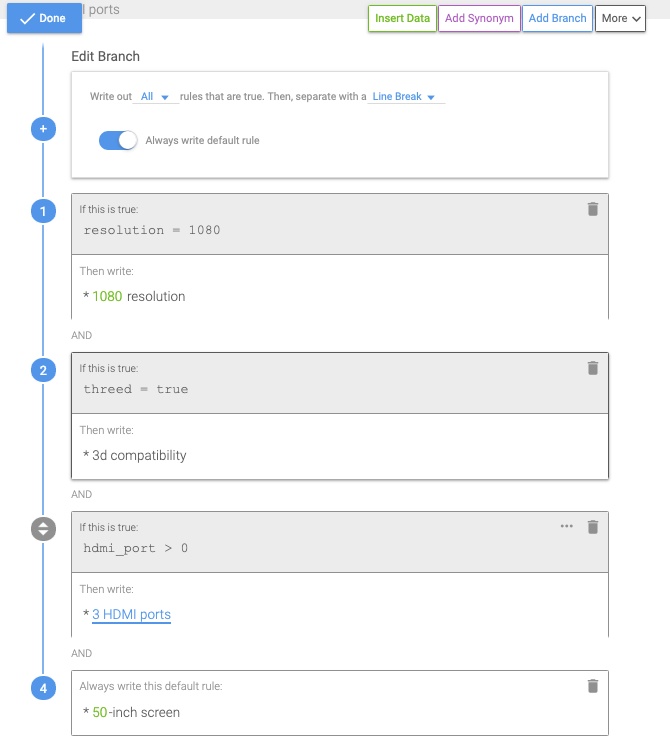
In this example, we are writing about TV's. While some rules may not be true, the default rule will always write the size of the television.
In other cases you may want to switch off the "Always write default rule" option. Let's assume you have another list, but this case you only want the default rule to write if none of the other options are true. You would essentially use the default rule as a fall-back plan to ensure something is written in case none of your other rules write.
Randomize your rules
When writing multiple true rules in Wordsmith, you may find yourself not only wanting to limit the number of rules that are written, but also to randomize the selected rules for added variation.
In this example, we can see that five rules are true for this particular row of data.
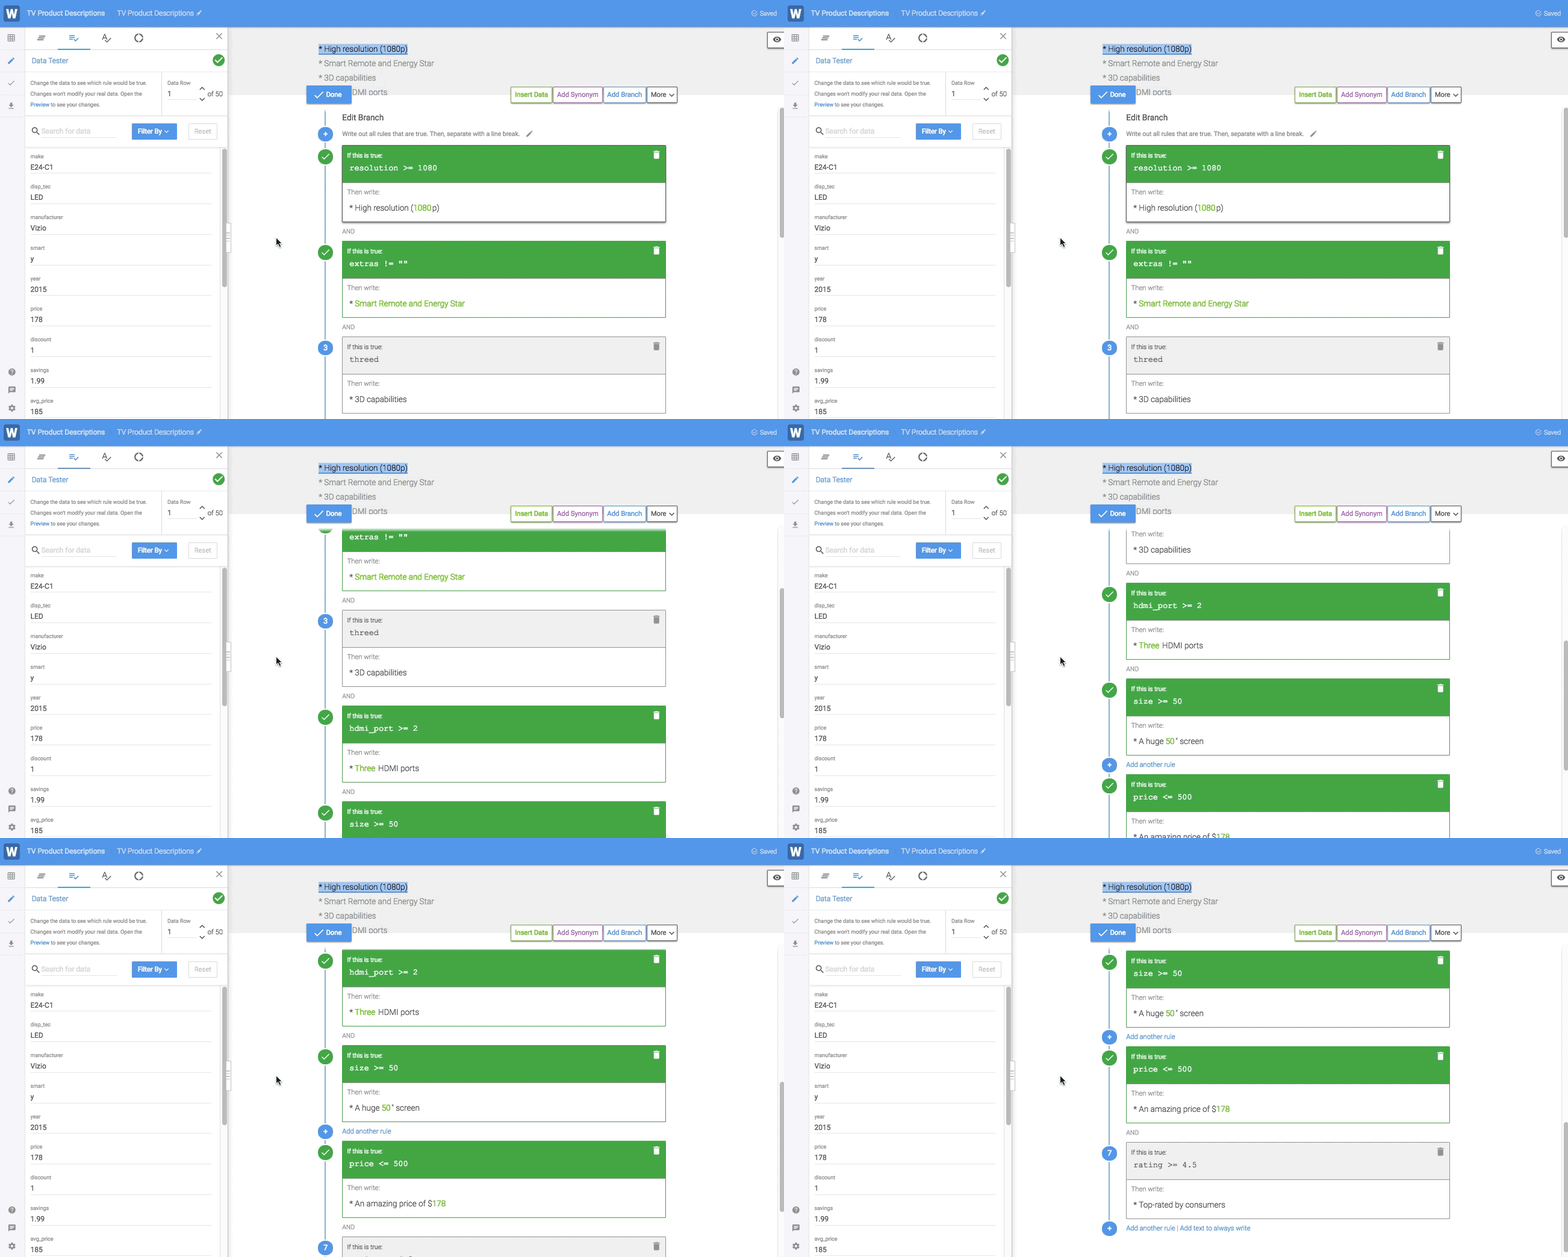
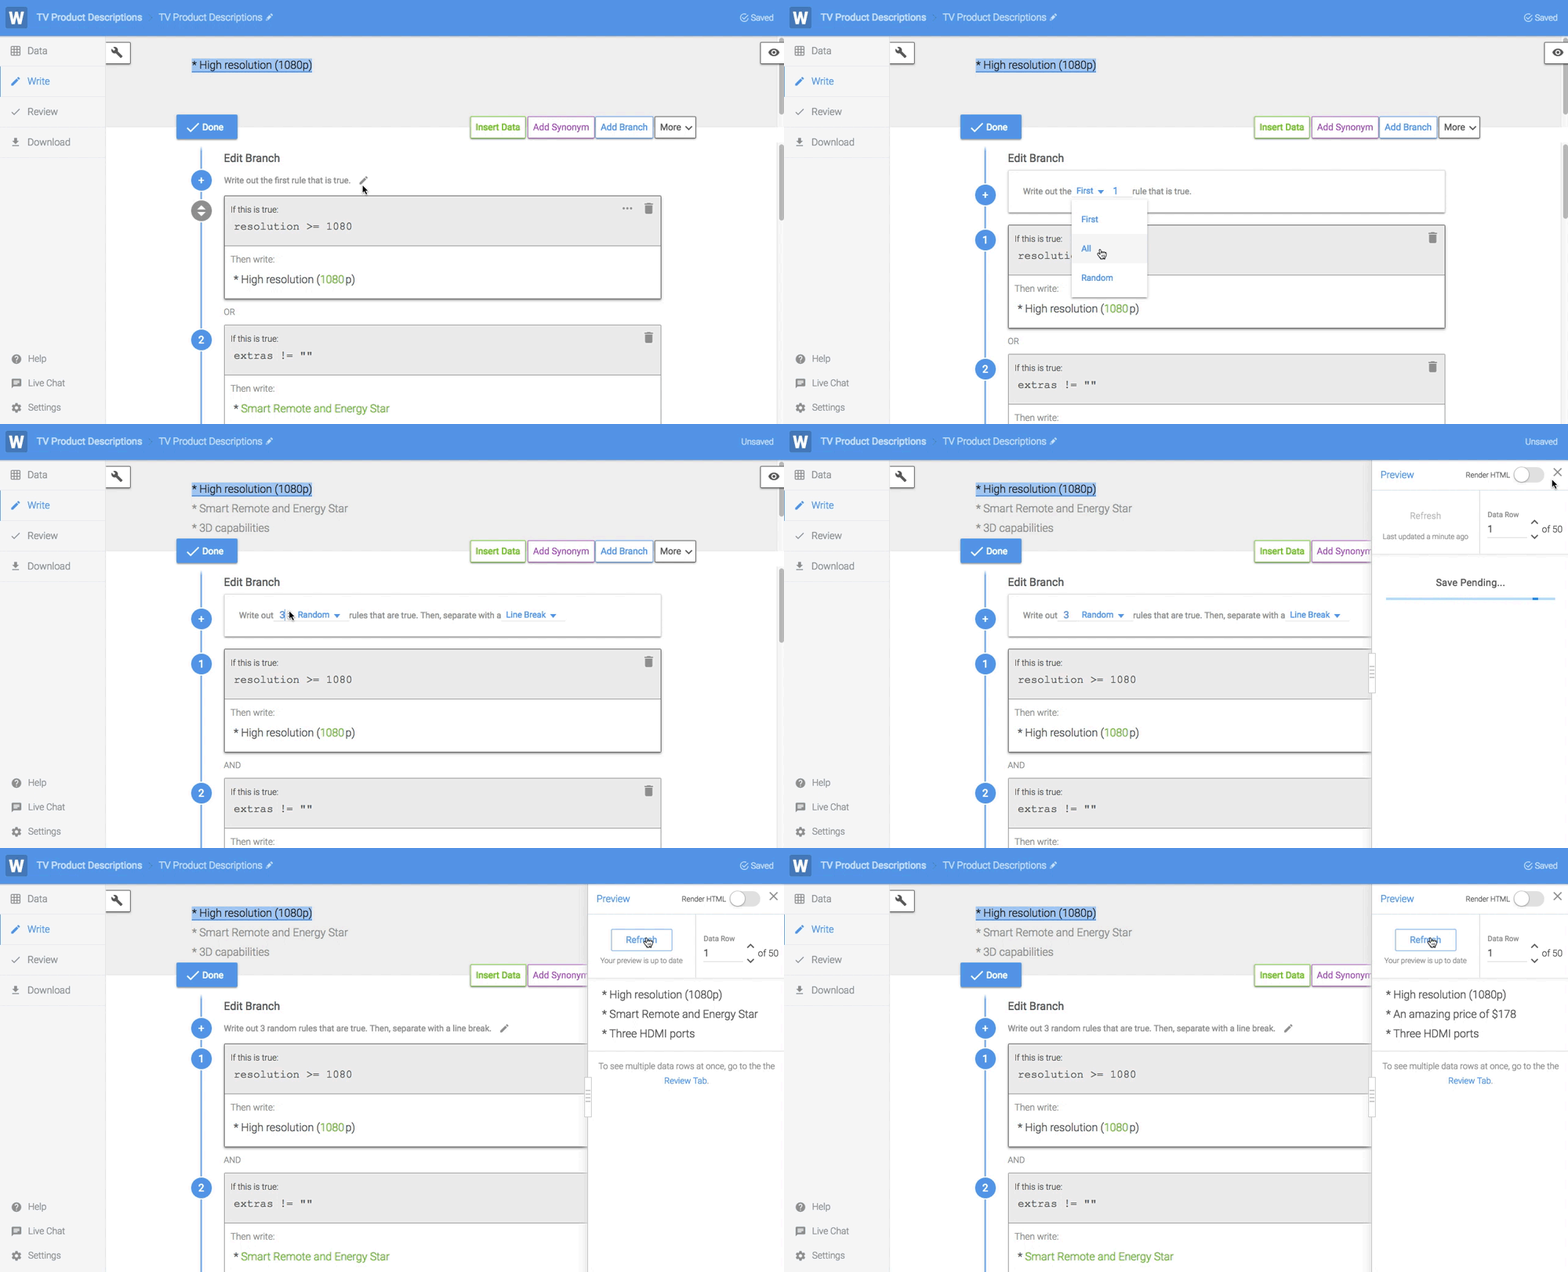
But if we want to limit the number of bullets in our narrative to only three, we can change the Branch settings to randomly select three of those five true rules.
DRY - Don't Repeat Yourself
Don't Repeat Yourself (DRY) is a principle in programming aimed at reducing repetition, and the same theory applies to Branches in Wordsmith. The idea is that if you see the same text written for multiple rules or the same logic duplicated in a Branch, there's probably a better way you can structure that Branch to limit repetition. With less duplication, there's a smaller chance of error, and if you want to edit your Branches later, you only have to update them in one spot versus many.
Here's an example of the same text written in multiple Branch rules.
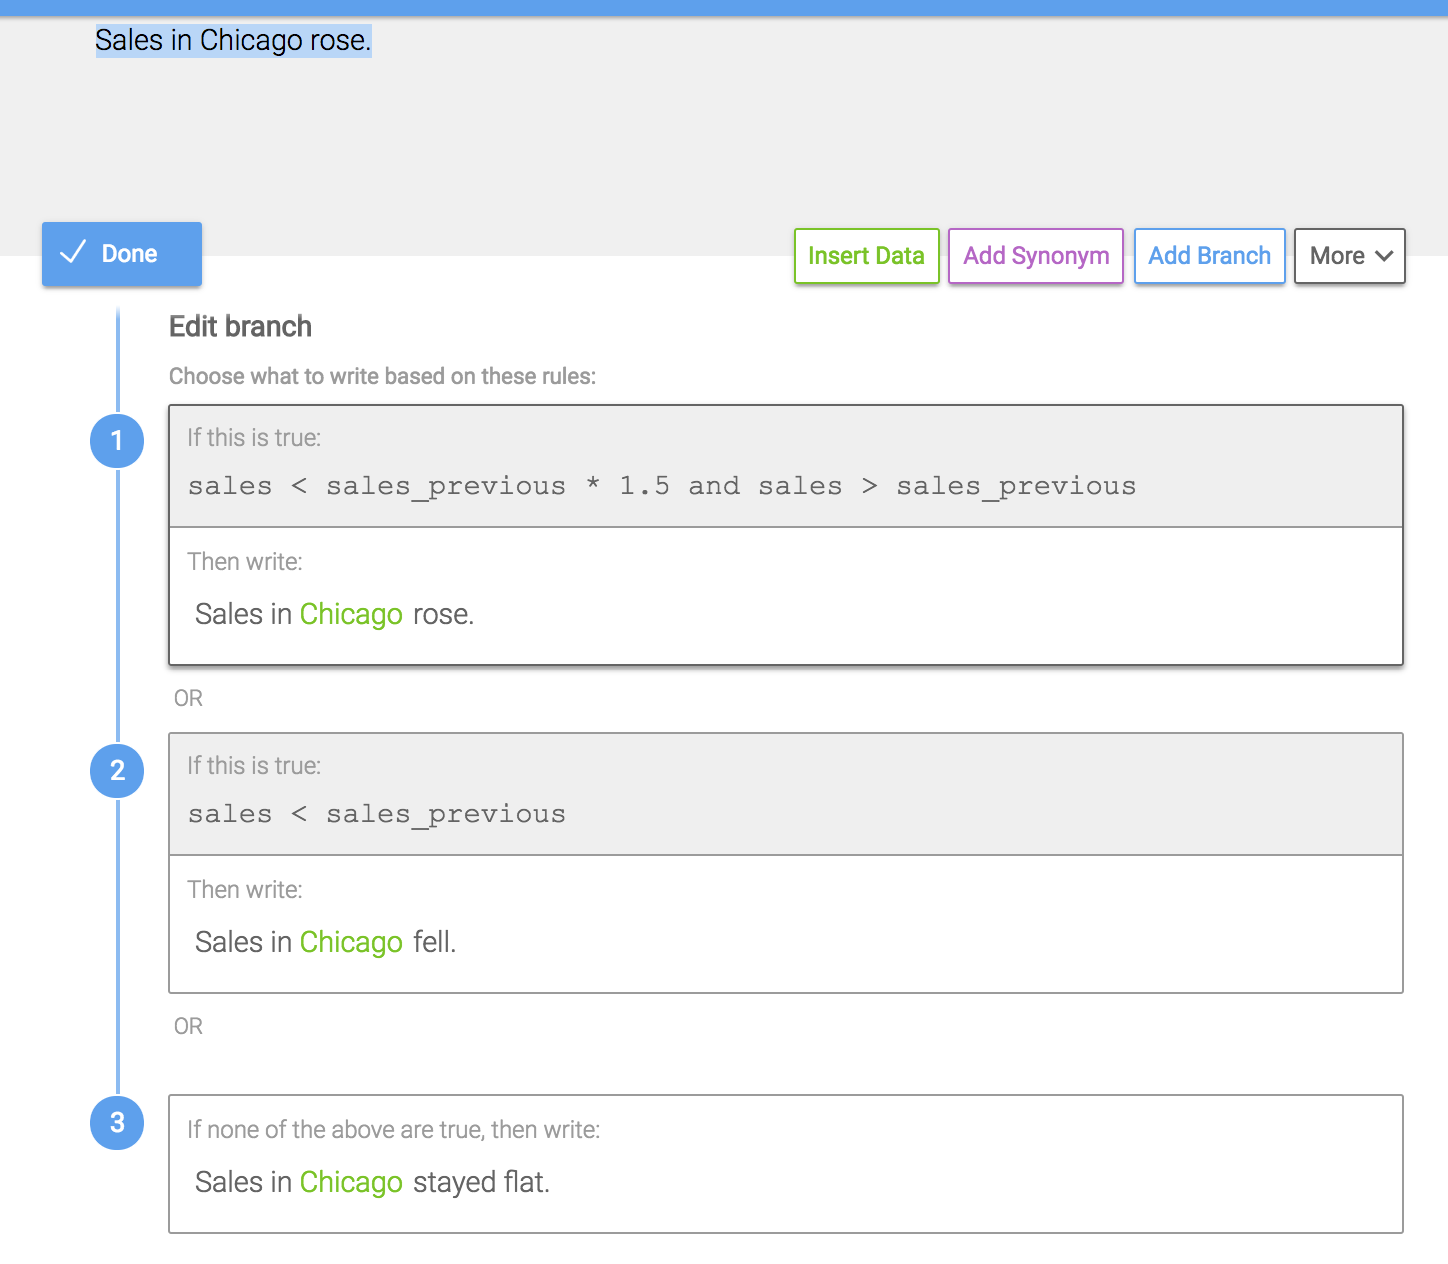
"Sales in Chicago" is in every option. That part of the sentence is not changing, so it doesn't need to be included in the Branch. Take it outside of the Branch, and only include the text that needs to change in the Branch.
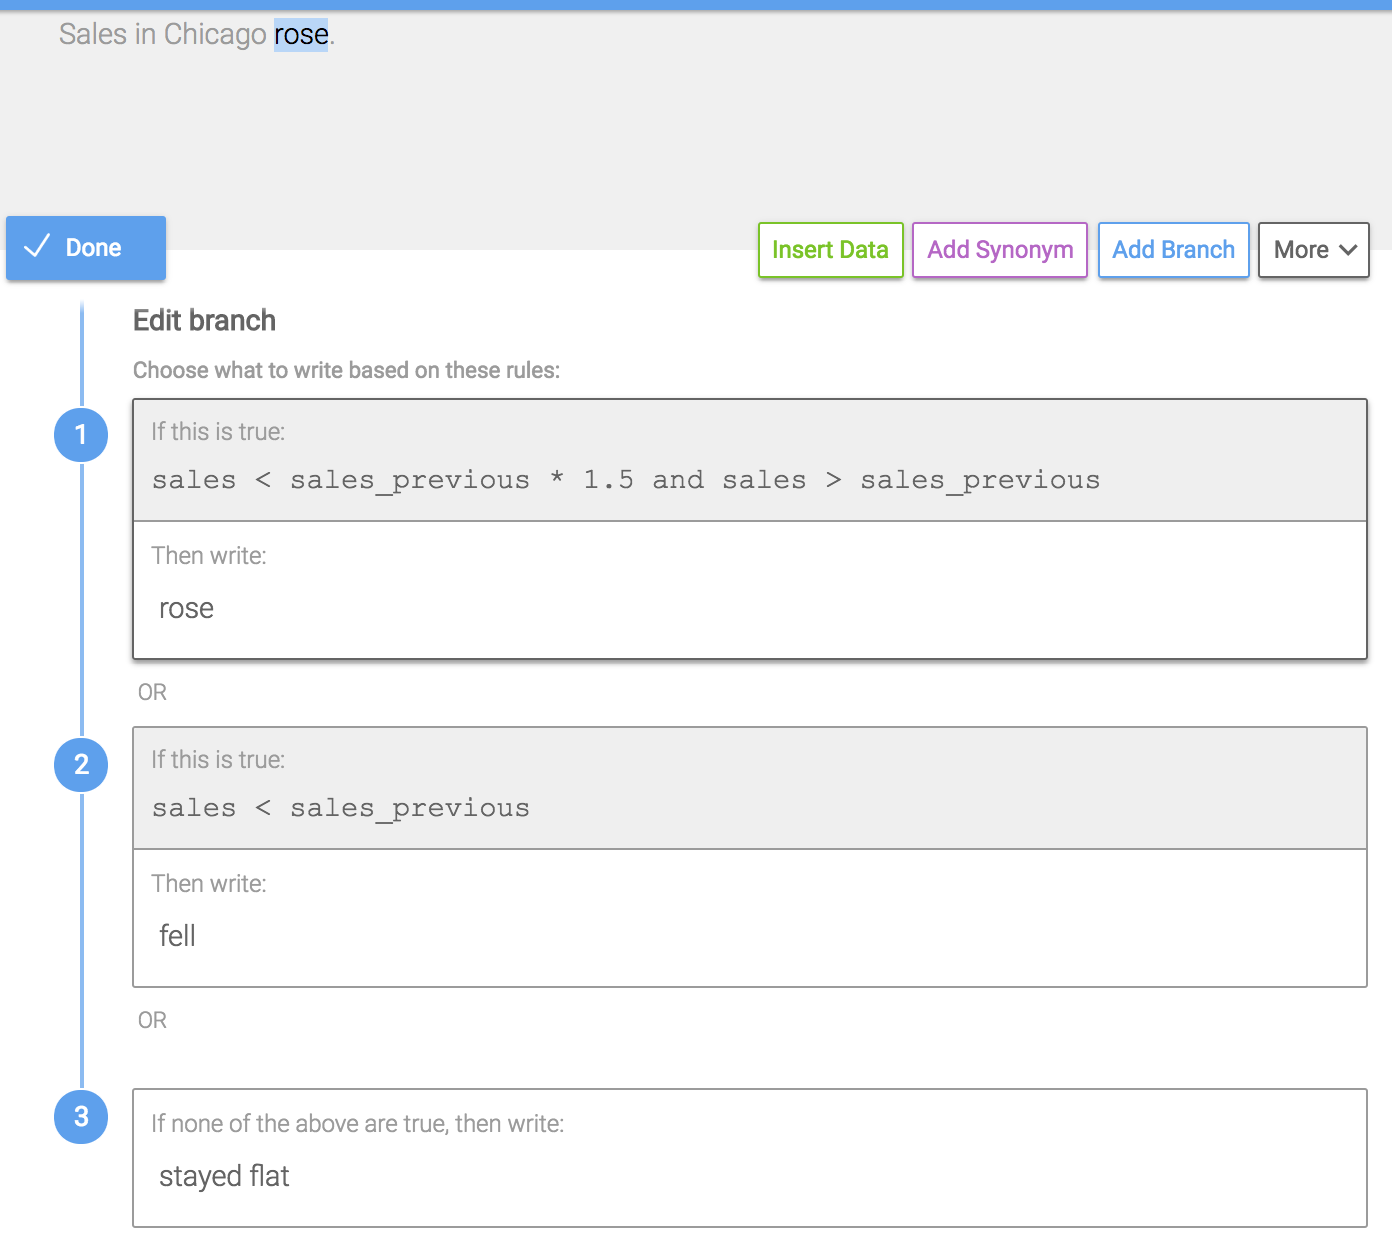
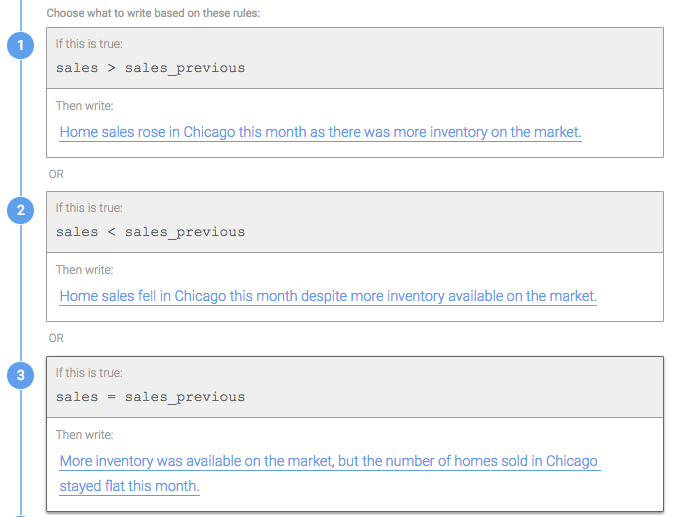
Duplicated logic should also be avoided. In the example below, sales > sales_previous is in every Branch rule.
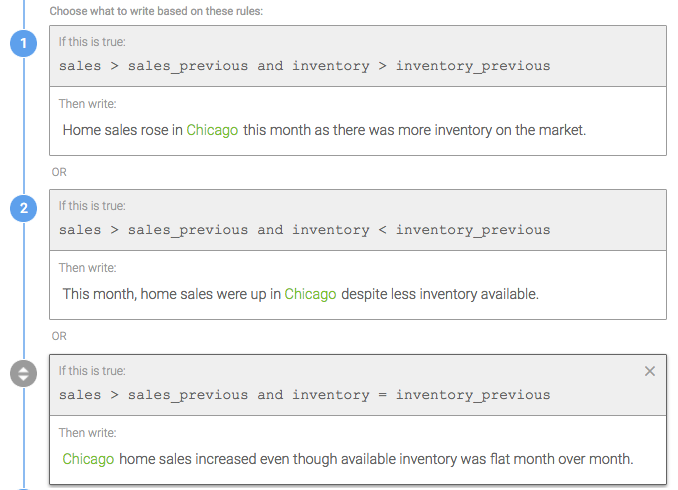
Nest Branches to remove duplicated logic.
Use the default rule strategically
Clicking the link in a Branch to "add text if no rules are true" allows you to write something even if all the Branch rules you've written are false. If you use the default rule, you'll always have something written in that part of your Template.
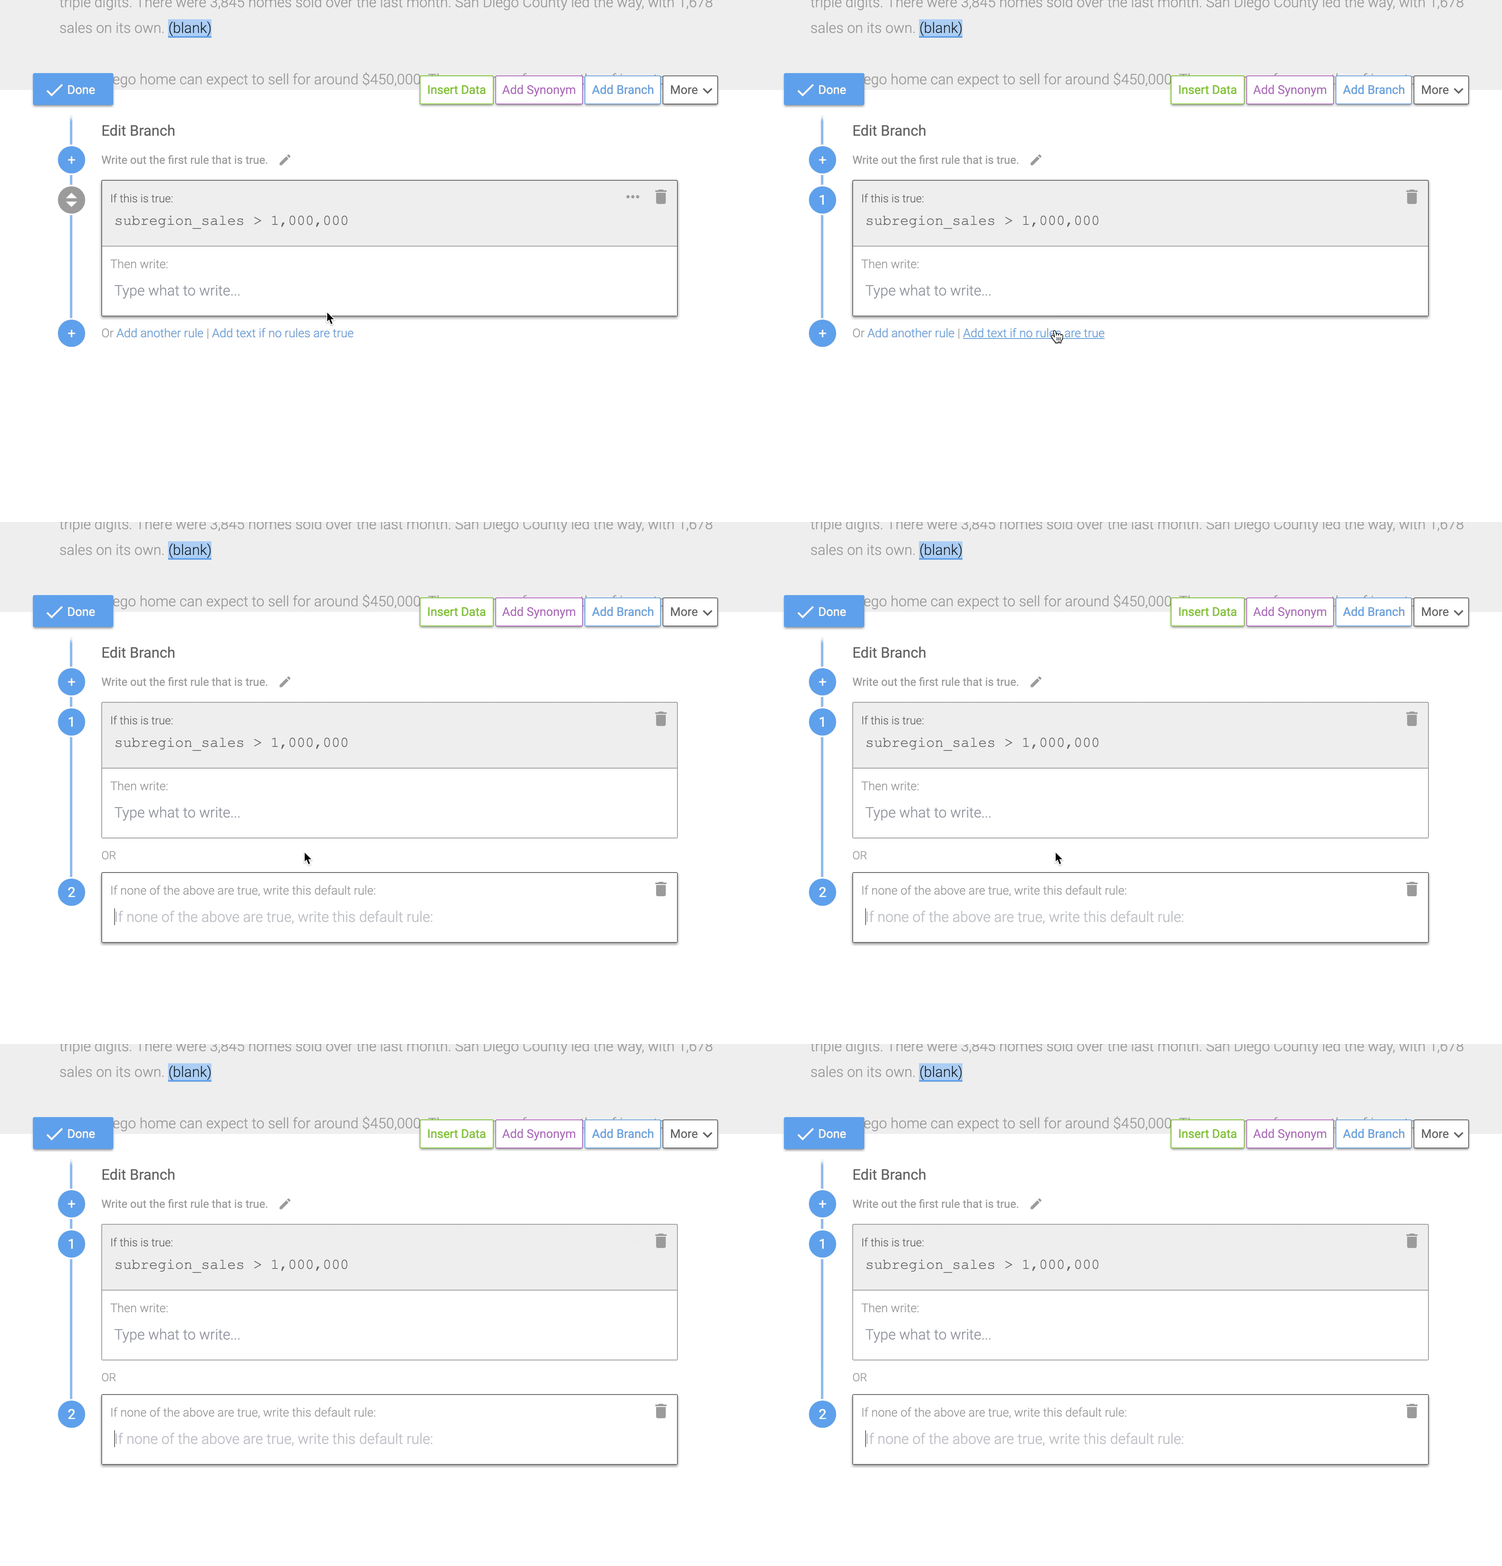
Here are a couple situations where it makes sense to use the default rule:
-
You have a lot of specific rules in a Branch. Instead of having to account for every single scenario in your data, you can use the default rule to more generally describe a situation that falls outside of the rules you've written.
-
Your sentence would not make sense if nothing was written in the Branch. Depending on what word or words you're changing in your Branch, your sentence may not read properly if nothing is written. You can use the default rule to make sure your sentence would be complete in any scenario.
-
There's only one remaining alternative to the rules you've written in your Branch. For example, you have a rule for your data > 0 and another rule for your data < 0. Since the only remaining scenario is data = 0, you could use the default rule instead of writing out that logic.
There are likely scenarios where you don't want to say something every time, we would think about those as optional Branches. If you only want to talk about something if it is important, and otherwise not mention it, then you shouldn't write a default rule.
Nest Branches to streamline Branch structure
If you are duplicating logic in a Branch or you need to account for changes in multiple data variables, you should nest Branches. Nested Branches follow a parent and child structure. The parent Branch is the outer level of the Branch or the first logic that is checked. A Branch nested inside that Branch is the child. In order for the child logic to be true, the parent logic also has to be true.
In the example below, we want to account for multiple combinations of two data variables changing: sales and inventory. These are the possible combinations:
- Sales rose and inventory rose
- Sales rose and inventory fell
- Sales rose and inventory stayed flat
- Sales fell and inventory rose
- Sales fell and inventory fell
- Sales fell and inventory stayed flat
- Sales stayed flat and inventory rose
- Sales stayed flat and inventory fell
- Sales stayed flat and inventory stayed flat
The parent Branch should check the first data variable. In this example, that would be sales > sales_previous, sales < sales_previous, and sales = sales_previous. And the child Branch should check the changes in the second data variable, in this example, inventory > inventory_previous, inventory < inventory_previous, and inventory = inventory_previous.
Here's a look at the nested Branch inside the first rule. Each parent rule has the same 3 nested rules: inventory being greater than, less than, or equal to the previous inventory.
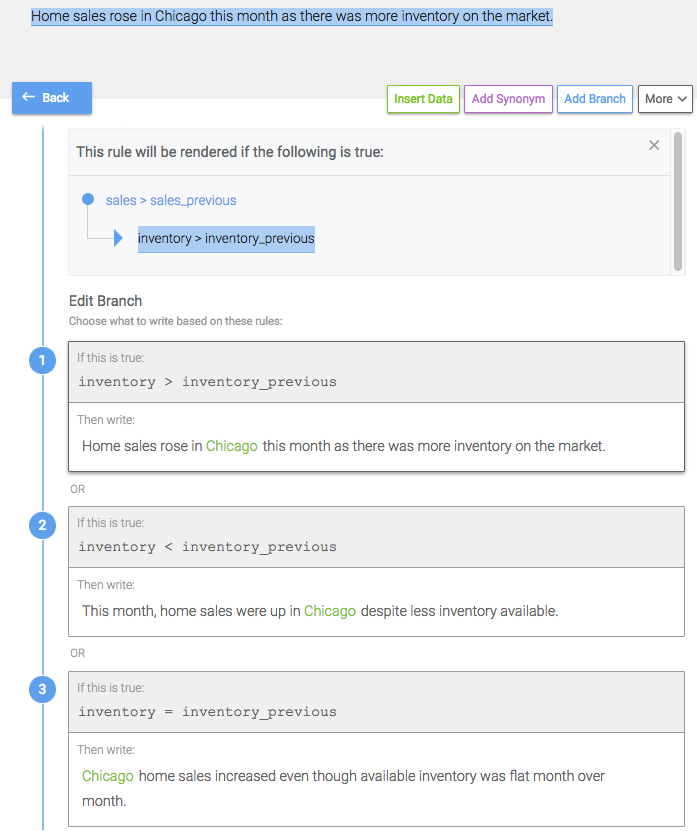
With this nested Branch structure, you can easily account for all 9 scenarios, including every combination of sales compared to sales_previous and inventory compared to inventory_previous. And you can easily see the logic for the parent of the Branch you’re working in by clicking on the Show Logic link at the top of the Branch.
Condition Rule Descriptions
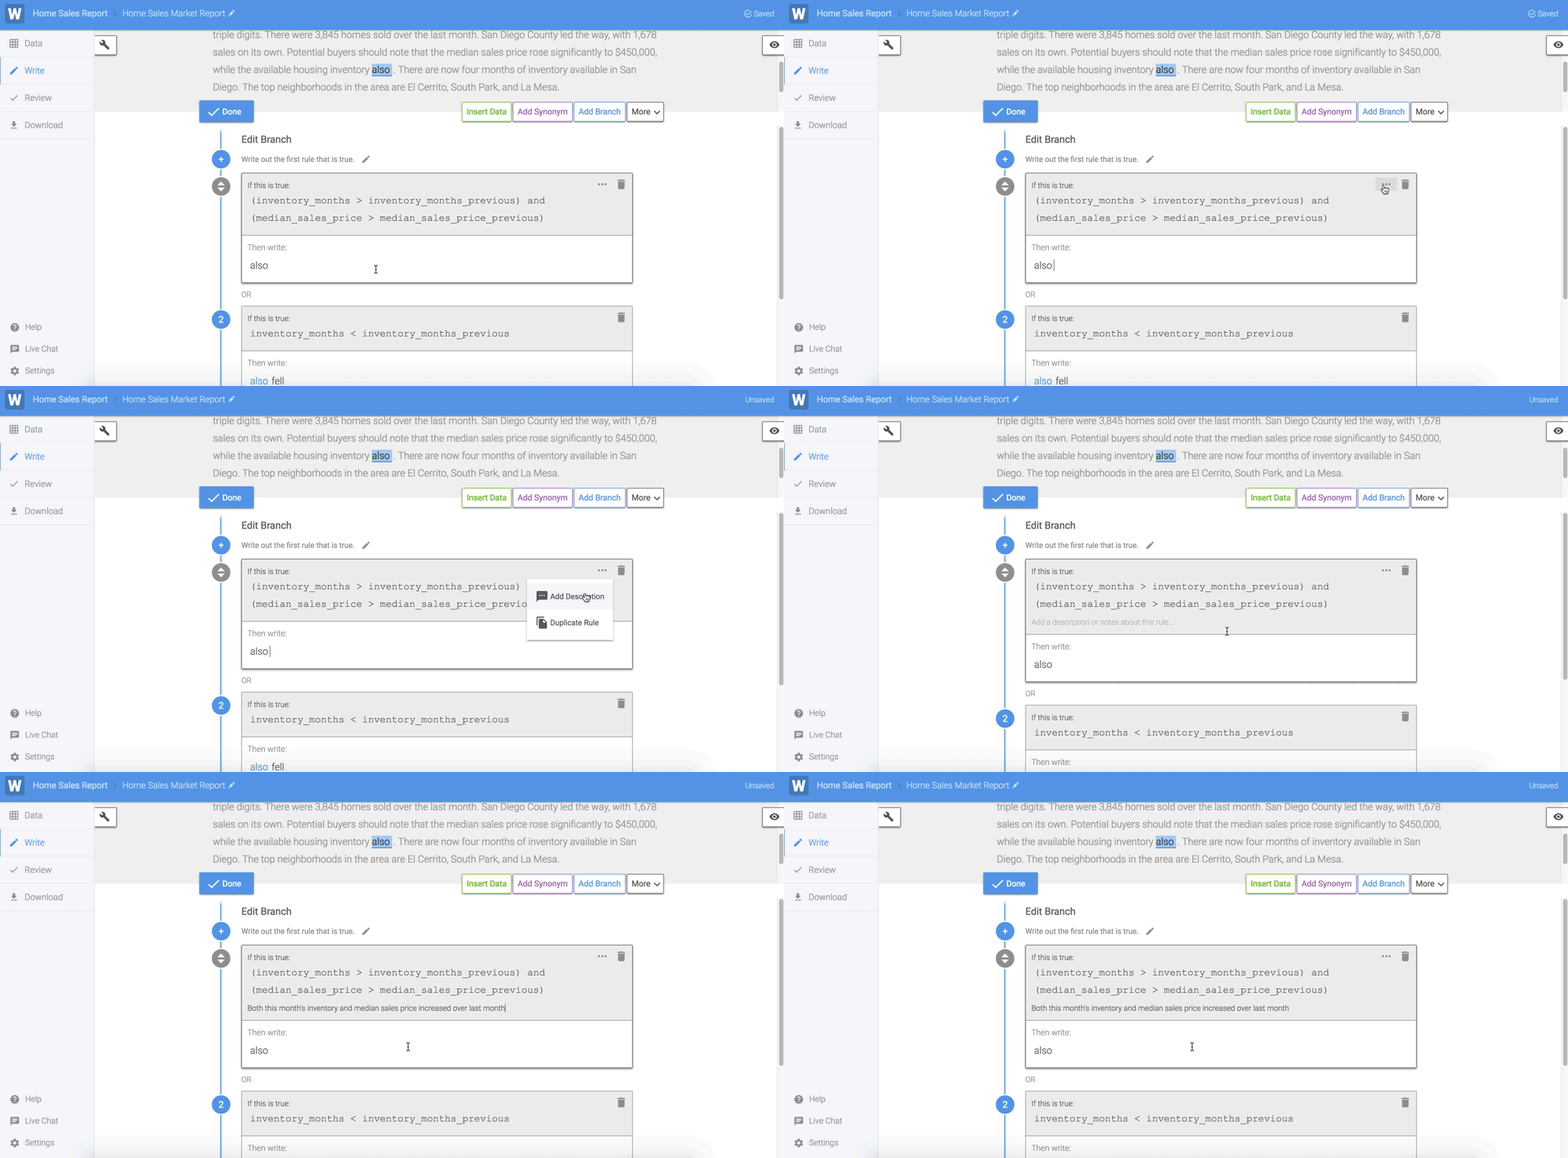
Use Condition Rule Descriptions to add plain text notes to your Branch rules. You can use the descriptions to explain complicated logic in layman's terms, flag rules you want to revisit later, or add internal notes for your team.
Updated over 6 years ago
