Using Tableau Data in Wordsmith
Selecting Worksheets
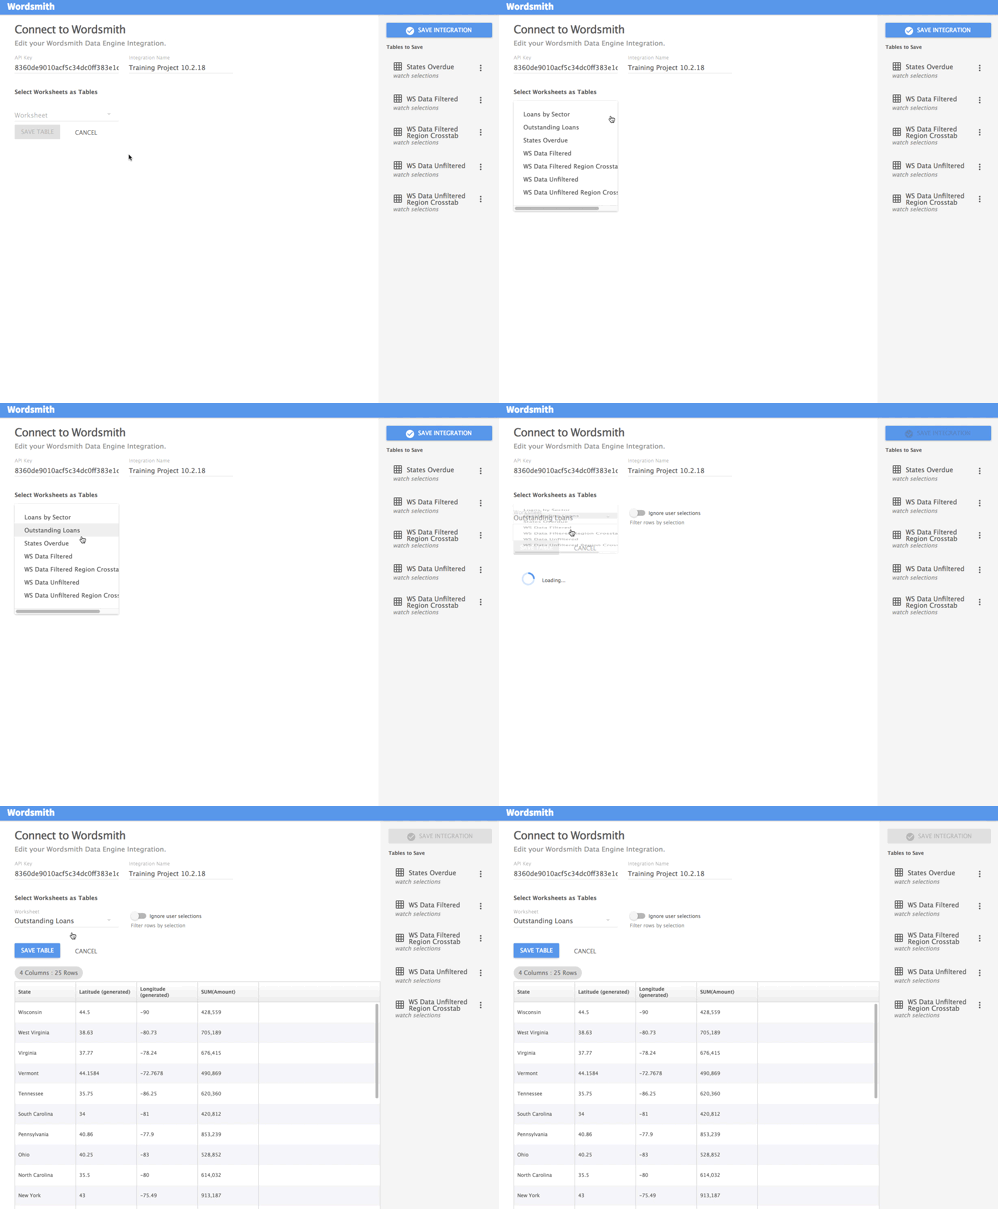
You'll see a list of all the worksheets in your Tableau dashboard. You'll use those worksheets to build data tables in Wordsmith. Think about the tables as a way to query the data so that you can pull out insights to write about. Start by selecting the worksheets that include the data you need based on what you want to write. You'll likely use more than one. And you may want to create a new worksheet in your Tableau dashboard just for data you'll use in Wordsmith.
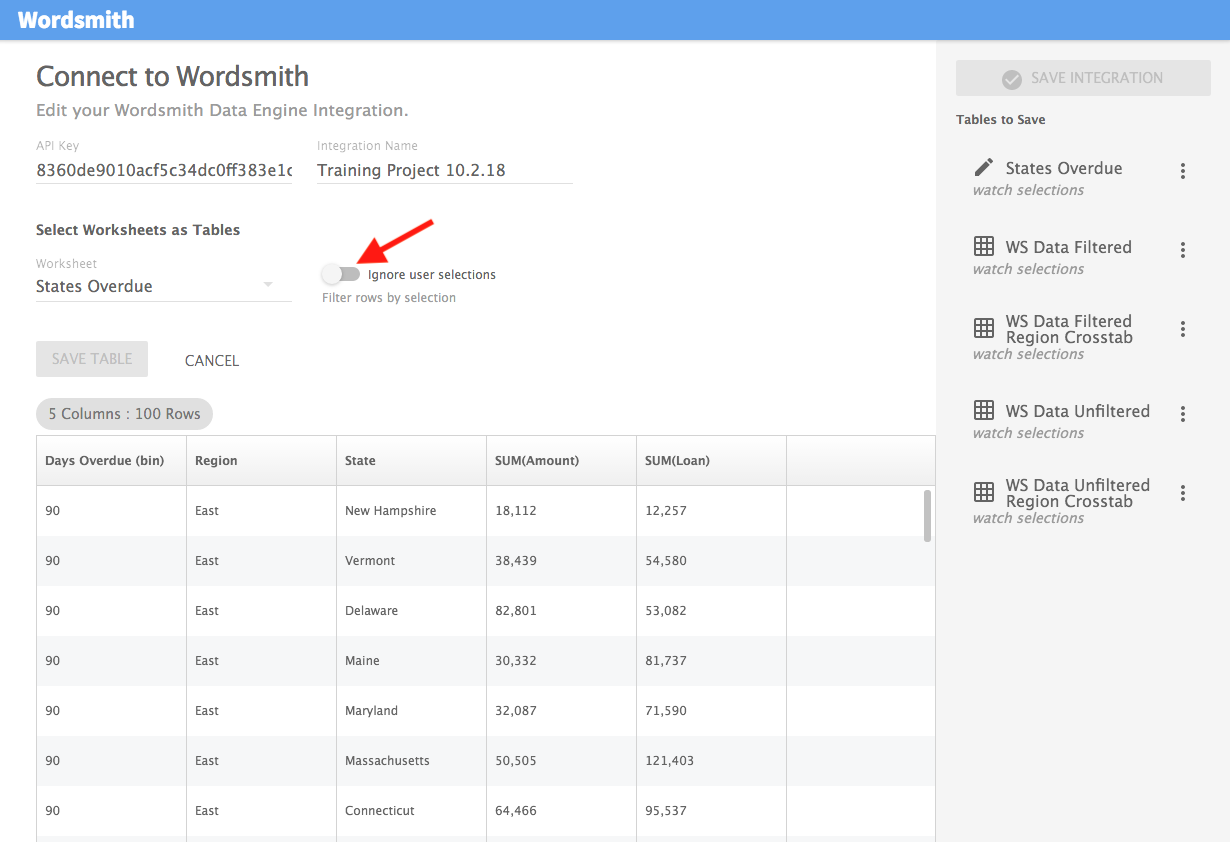
Watch or Ignore User Selections
If the worksheet you're using in Wordsmith is interactive, meaning a user can click on something in the visualization that will filter the underlying data, you can choose to either watch that selection or ignore it using the toggle when you select a worksheet. Watching user selection means that the data you use in Wordsmith will be filtered as the data is filtered in Tableau. Ignoring user selections means the data won't be filtered even if a user filters the visualization in Tableau. You may want to add both a table that watches user selections and one that ignores user selections to give you more flexibility in the data you'll write about.
A note on Filters in Tableau
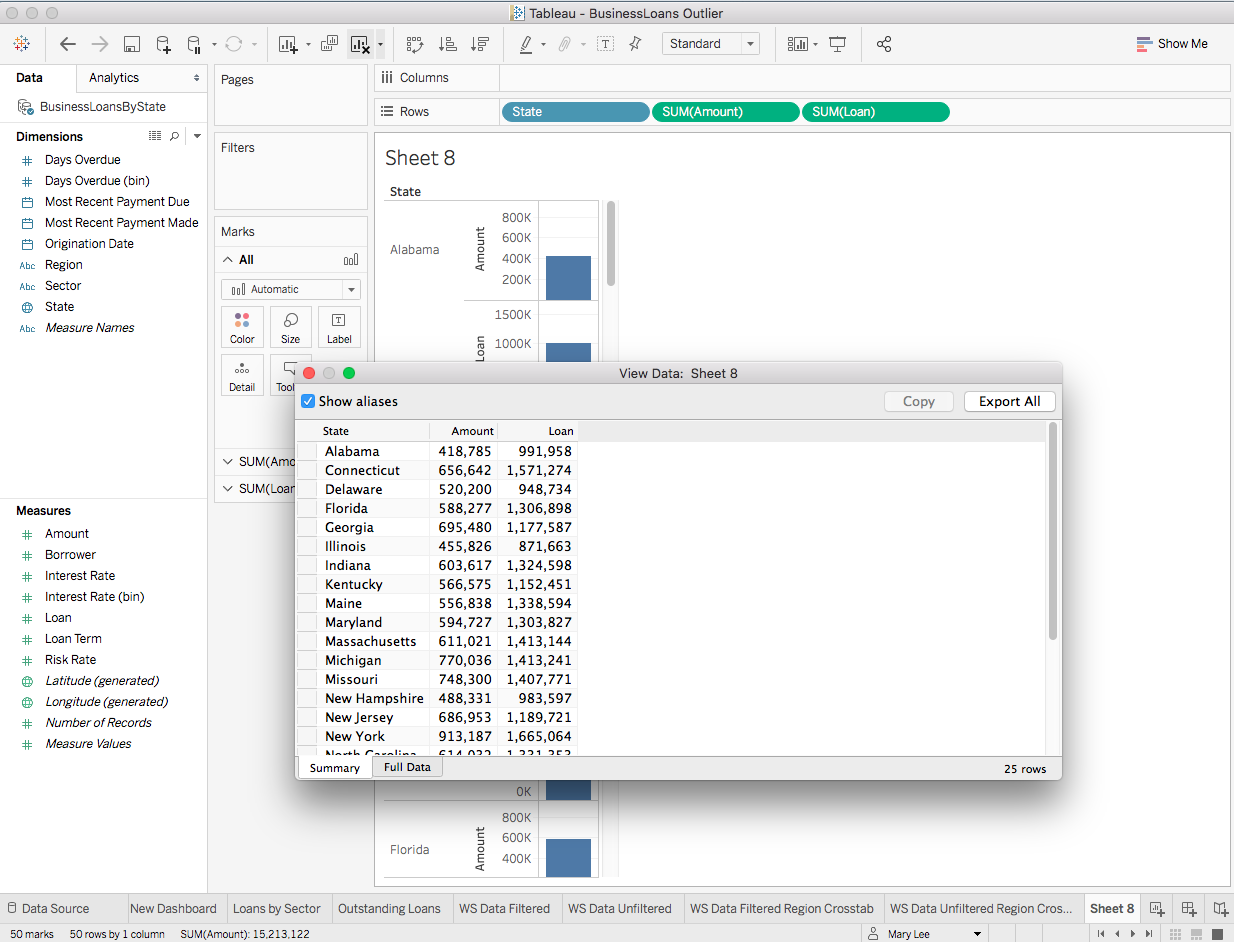
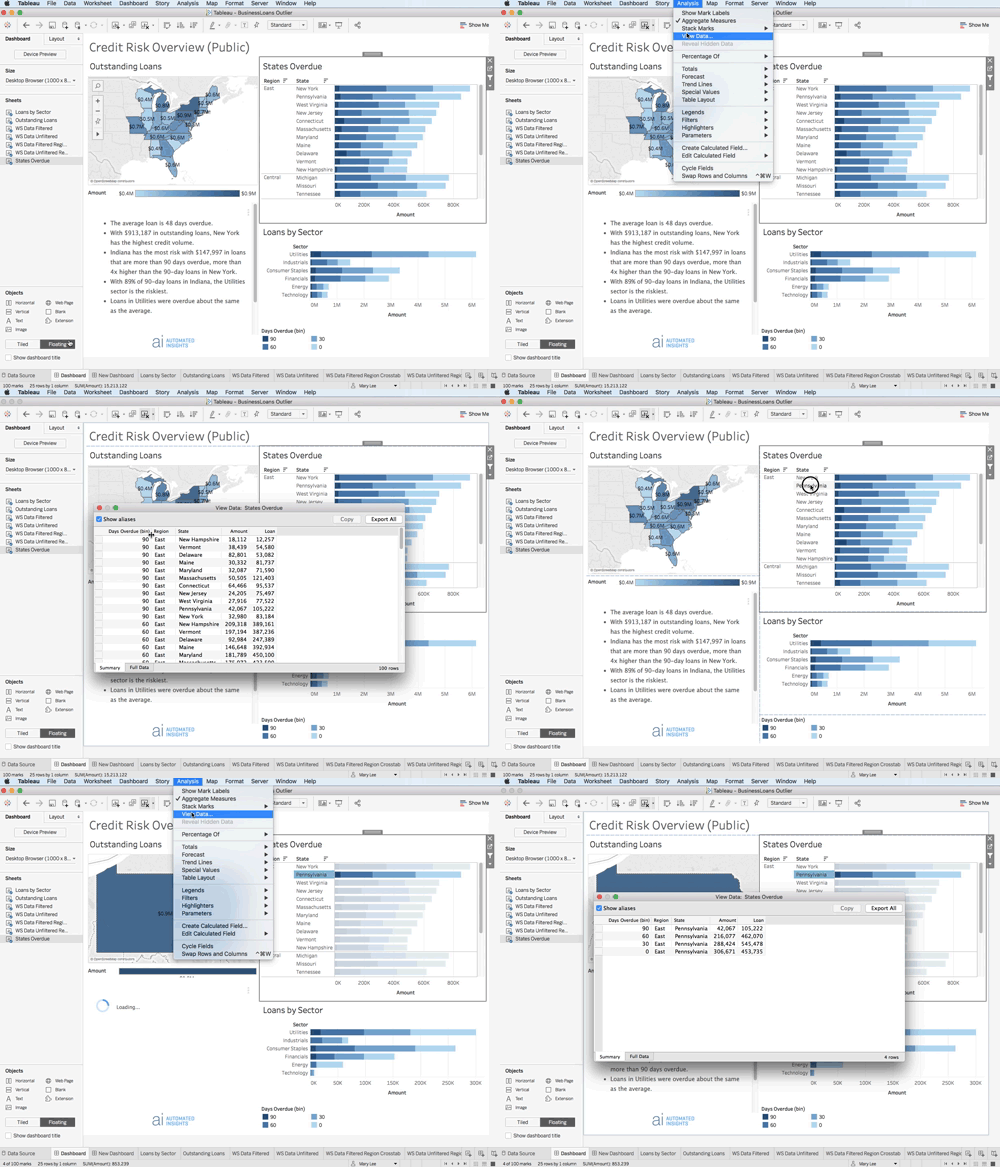
There are different actions you can set up in Tableau that may filter the underlying data, highlight it, or do nothing. Because you're using that data in Wordsmith, it's important to understand how those dashboard actions are working and how your data is changing. To see the underlying data for any worksheet, select Analysis >> View Data. This is the data table that will be sent to Wordsmith.
Building a Worksheet to Use in Wordsmith
Just like you build worksheets for visualizations in Tableau, it's a best practice to build worksheets to write about in Wordsmith. The benefit of Wordsmith is that you can use any of the worksheets in your dashboard, you're not limited to just one.
Reasons to use a new worksheet for Wordsmith
- Data that is difficult to visualize may be better represented with text.
- Reference additional data not included in your visualizations.
- Re-organize your data or pull together different tables to provide additional context.
How to build a Wordsmith worksheet
Building a worksheet to use in Wordsmith is a little different than building a worksheet to visualize something. The chart you're creating doesn't matter because it won't be shown in your dashboard, you just need to get the data table the way you want it. It usually works best to drag all of your dimensions and measures into the rows shelf. You can select Analysis >> View Data to see what the data table looks like.
Hiding a worksheet in your dashboard
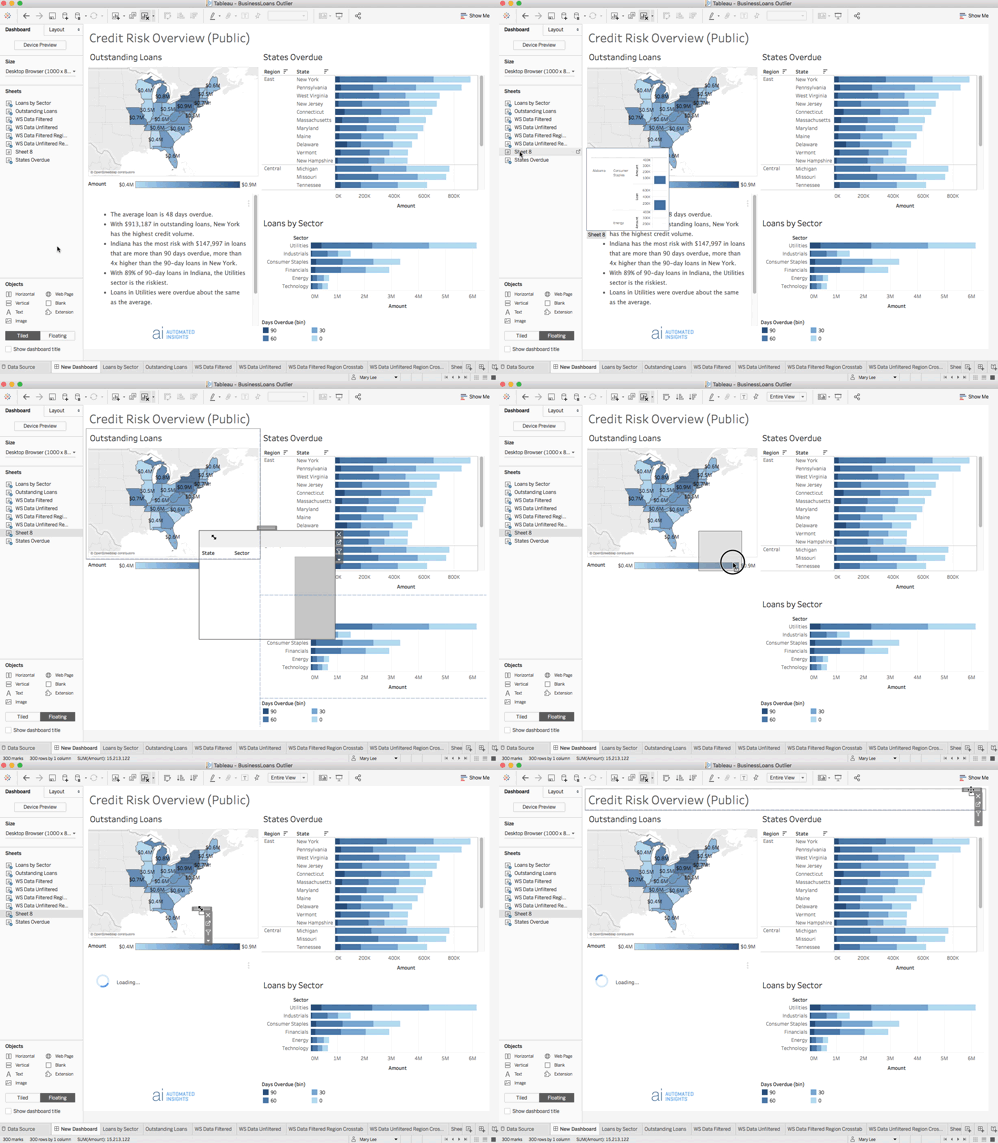
If you built a worksheet to use in Wordsmith, you need to add it to your dashboard, but you likely don't want it to be visible to your viewers. Add it to the dashboard as a floating object, and resize it to be really small, then place it somewhere where viewers are unlikely to click.
Understanding the Data
You can see exactly what data you'll have access to in Wordsmith from your Tableau dashboard. To do that, select a worksheet, click on Analysis, then choose View Data. This data table is exactly what you'll see in Wordsmith.
And if the worksheet you're using is interactive, you can see how users interactions filter the data. Just click on the visualization to filter it in some way, and view the data again by selecting Analysis >> View Data. This is a great way to understand how your data table is changing as users interact with your visualization.
The type of data you have in Tableau will affect the functions you're able to perform on it in Wordsmith.
Add or Edit Data
Add a New Worksheet
To add a new worksheet to your Wordsmith integration, make sure that the worksheet is in your Tableau dashboard.
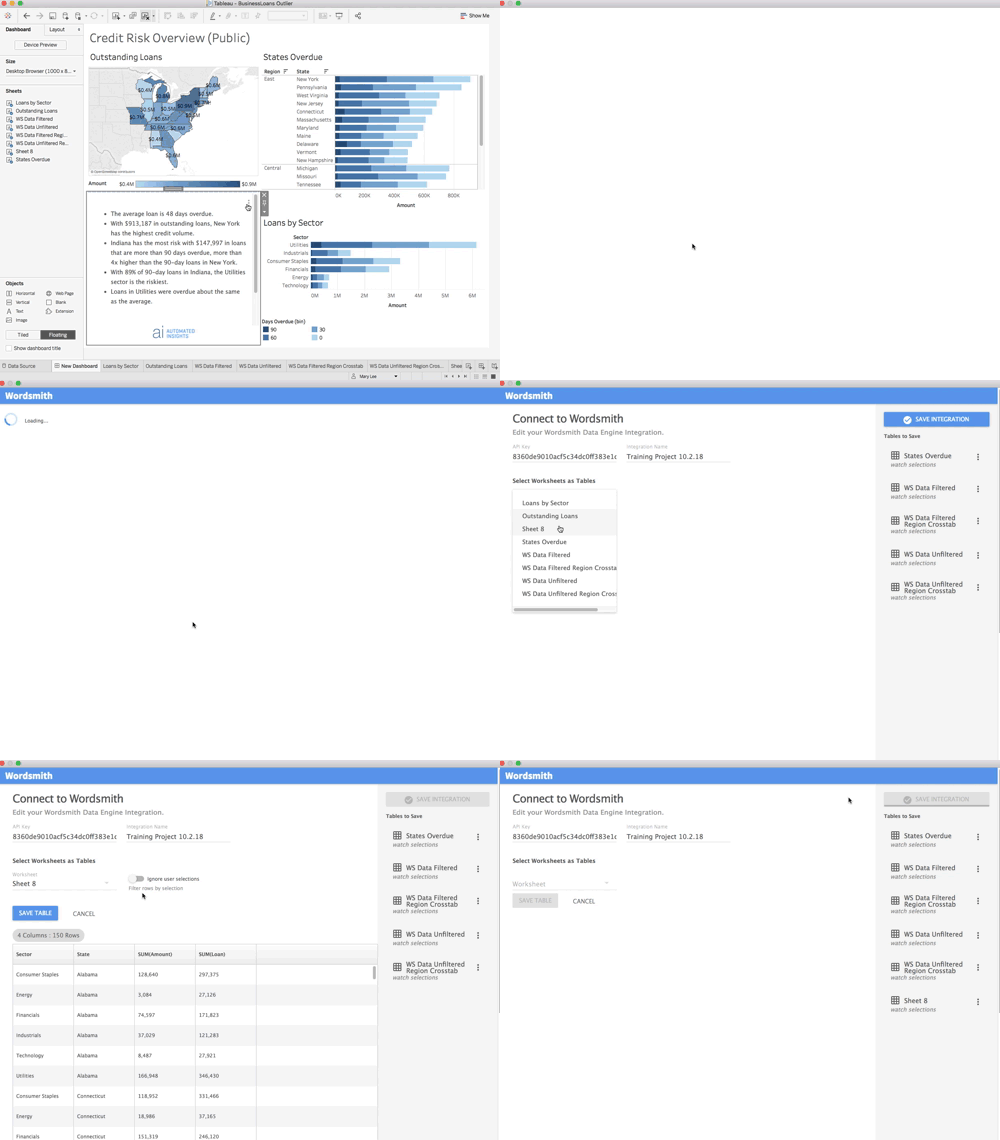
If you're using the Wordsmith Extension, select Edit Integration from the drop-down list in the top right of the extension. You'll see all the worksheets in that dashboard under the 'Select Worksheets as Tables' field. Just select the worksheet you want to add to the integration, save the table, and then save your integration.
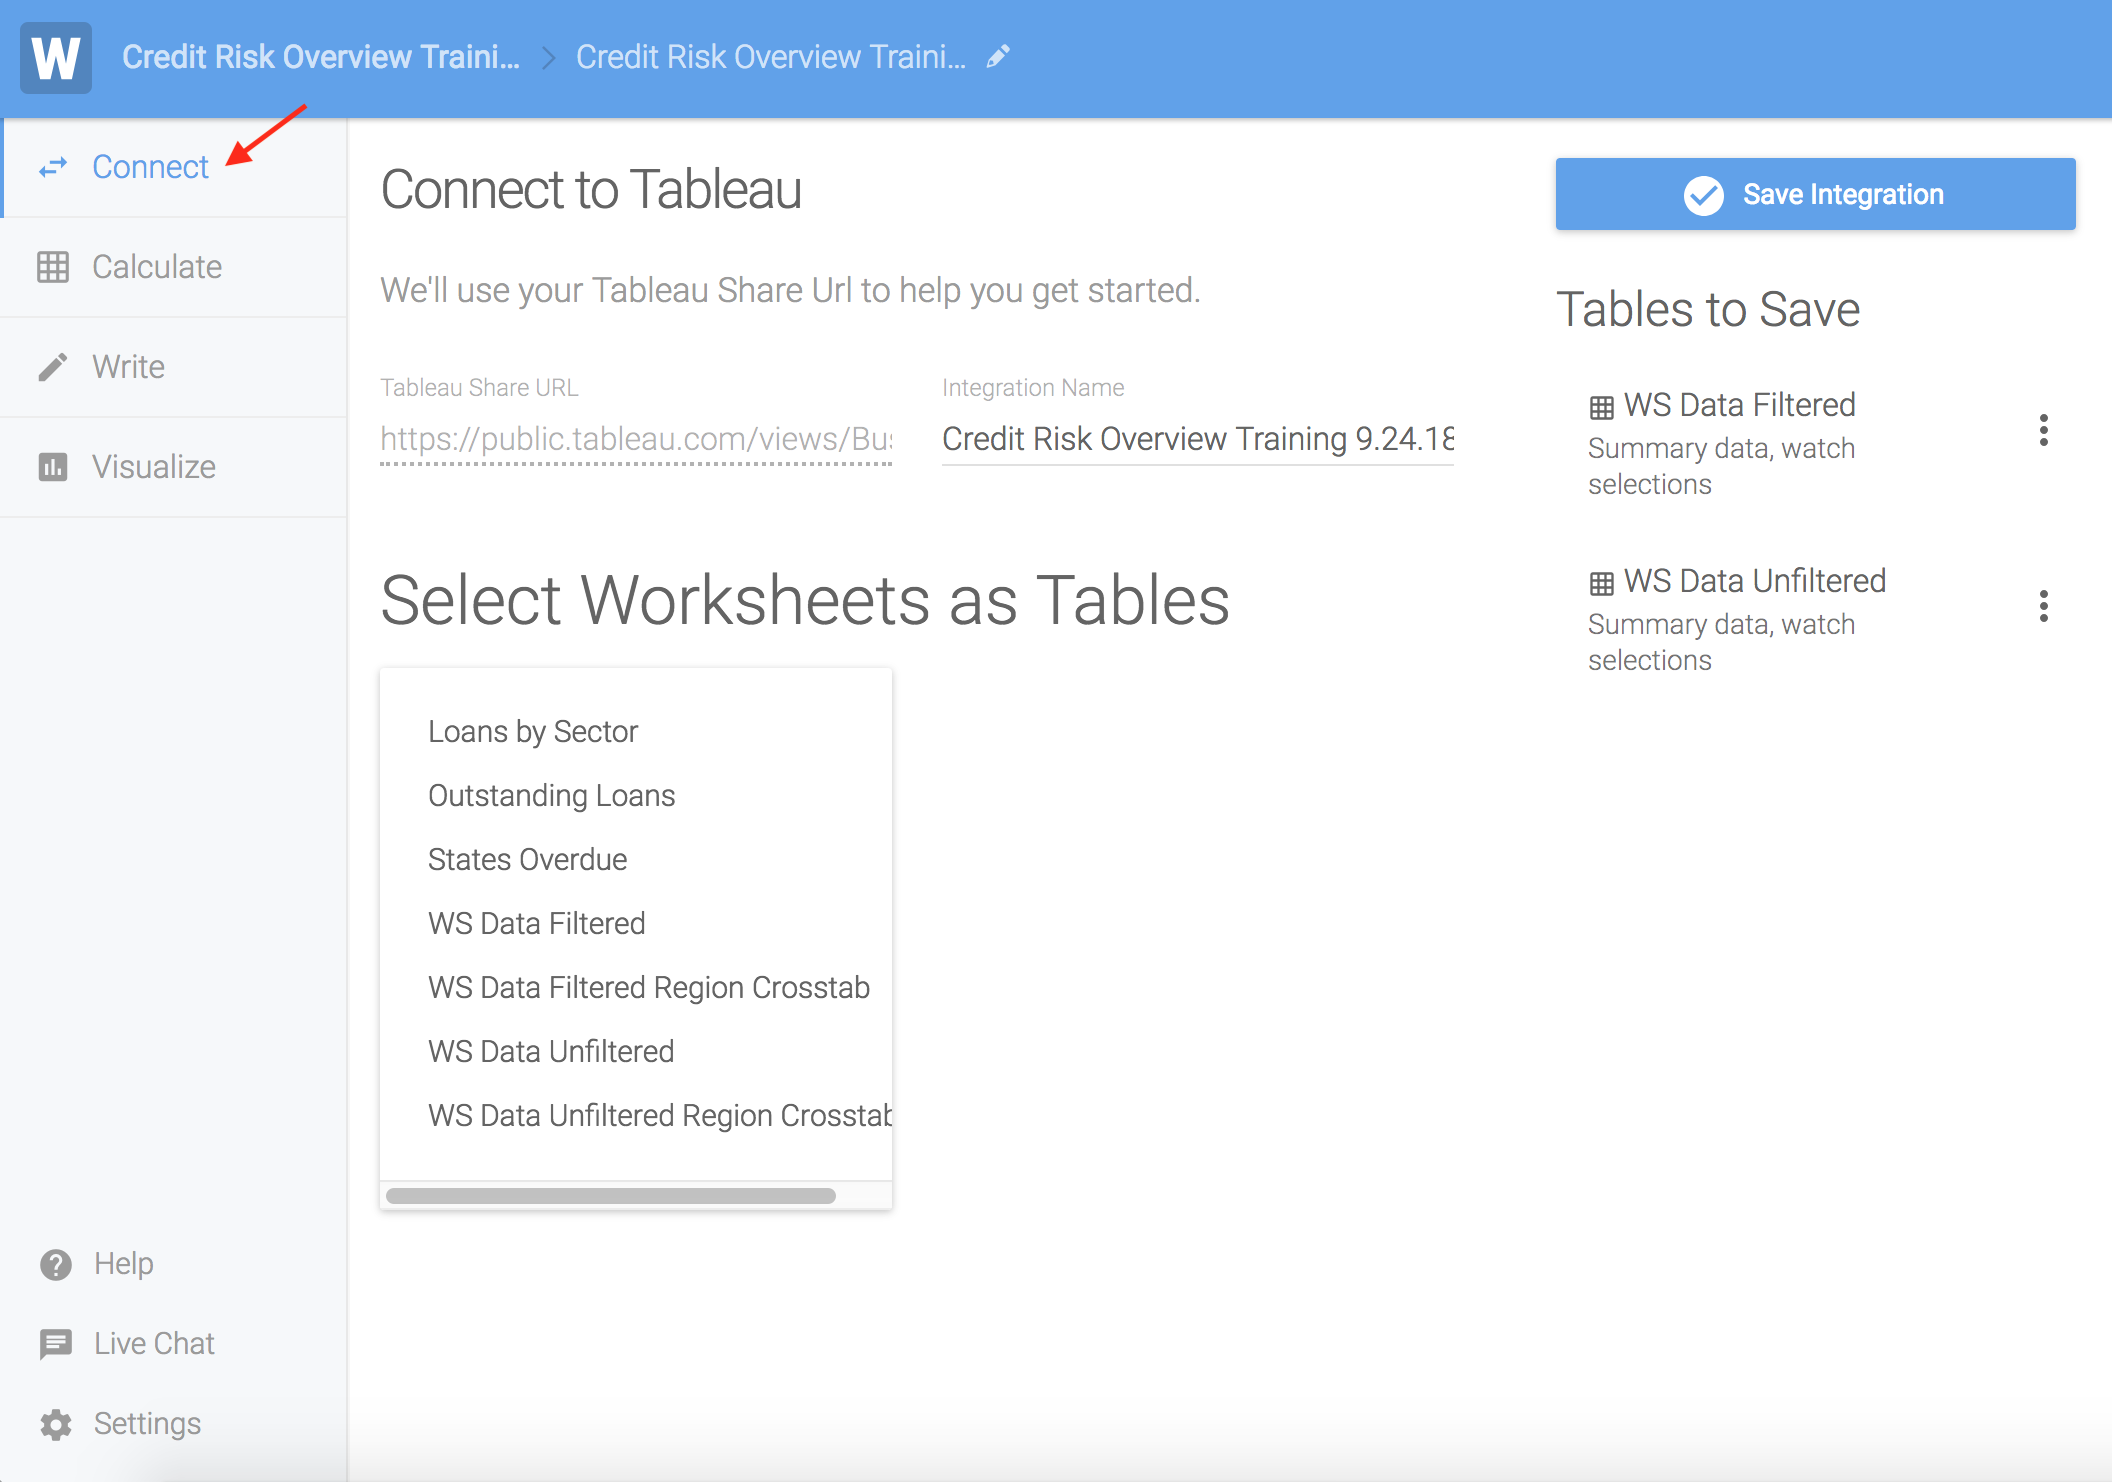
If you're using the Tableau Legacy Integration, go to the Integration page by either selecting 'Edit Connection' on your main project page or 'Connect' if you're already in the Template. You'll see all the worksheets in that dashboard under the 'Select Worksheets as Tables' field. Just select the worksheet you want to add to the integration, save the table, and then save your integration.
Edit Data in a Worksheet
You can edit the data in a worksheet you've already created an integration for, even if you've written Calcs or a Template.
If you're using the Wordsmith Extension, select Edit Integration. When the integration page loads, click "Save Integration". This will save any changes you've made to the data used in Wordsmith. If you removed or changed the name of a column you were using in your Calcs, you'll see error messages in the Wordsmith Extension, in your Template, and on the Calculate page. Resolve these errors by adding the column back to the worksheet in Tableau and saving the integration again, or rewriting your Calcs to not include the missing or changed column.
If you're using the Legacy Integration, go to the Connect page. Open the table you made changes to by selecting the the three dots next to the table name and clicking "Edit Table". You should see the changes you made to your worksheet reflected in the table of data. Click "Save Table" then "Save Integration" to update the data used in your Calcs and Template. If you removed or changed the name of a column you were using in your Calcs, you'll see an error icon on the Calculate page.
Updated over 6 years ago
