Dashboard
This is your Dashboard. It's your main hub in Wordsmith, housing all of your team's Projects.
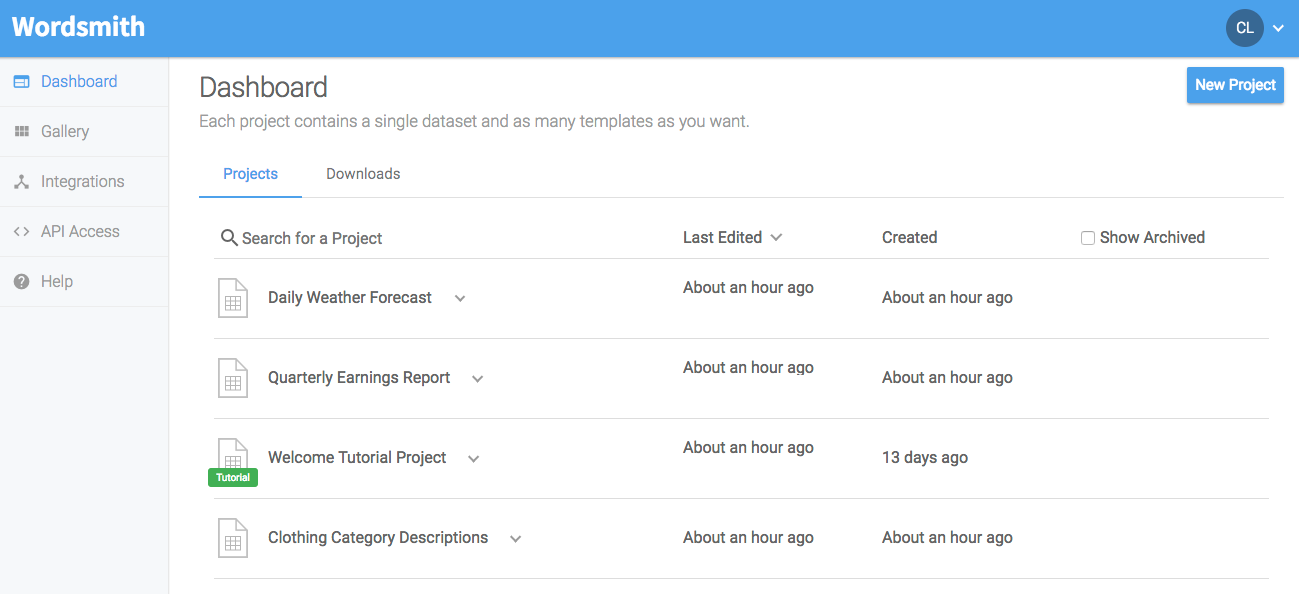
Projects
Projects are like folders that include your data file and any Templates you build off of that data. You can have as many Projects as you want and as many Templates within them as you can create. But you can only have one data file per Project. So if you have multiple data files or different types of narratives to create, consider creating separate Projects for them. Here are the actions you can take with each Project:
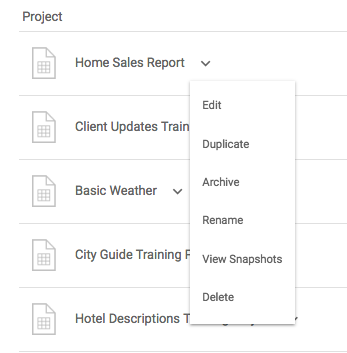
Edit
To make any changes to the Project, either click on Edit or just the name of the Project.
Duplicate
Create a copy of the entire Project, including the data and Templates, by selecting Duplicate.
Archive
Keep your Dashboard organized by archiving Projects. Archiving a Project will just move it out of your main view so you can focus on a particular working set of Projects. Bring any archived projects back by clicking the 'Show Archived' tab at the top right of the Projects table.
Rename
Change the name of a Project. Keep in mind that if you're using the Wordsmith API, the project slug will need to be updated with the new name.
View Snapshots
Learn more about snapshots here.
Delete
Deleting a Project will remove it forever, so make sure you no longer need a Project before deleting it.
Templates
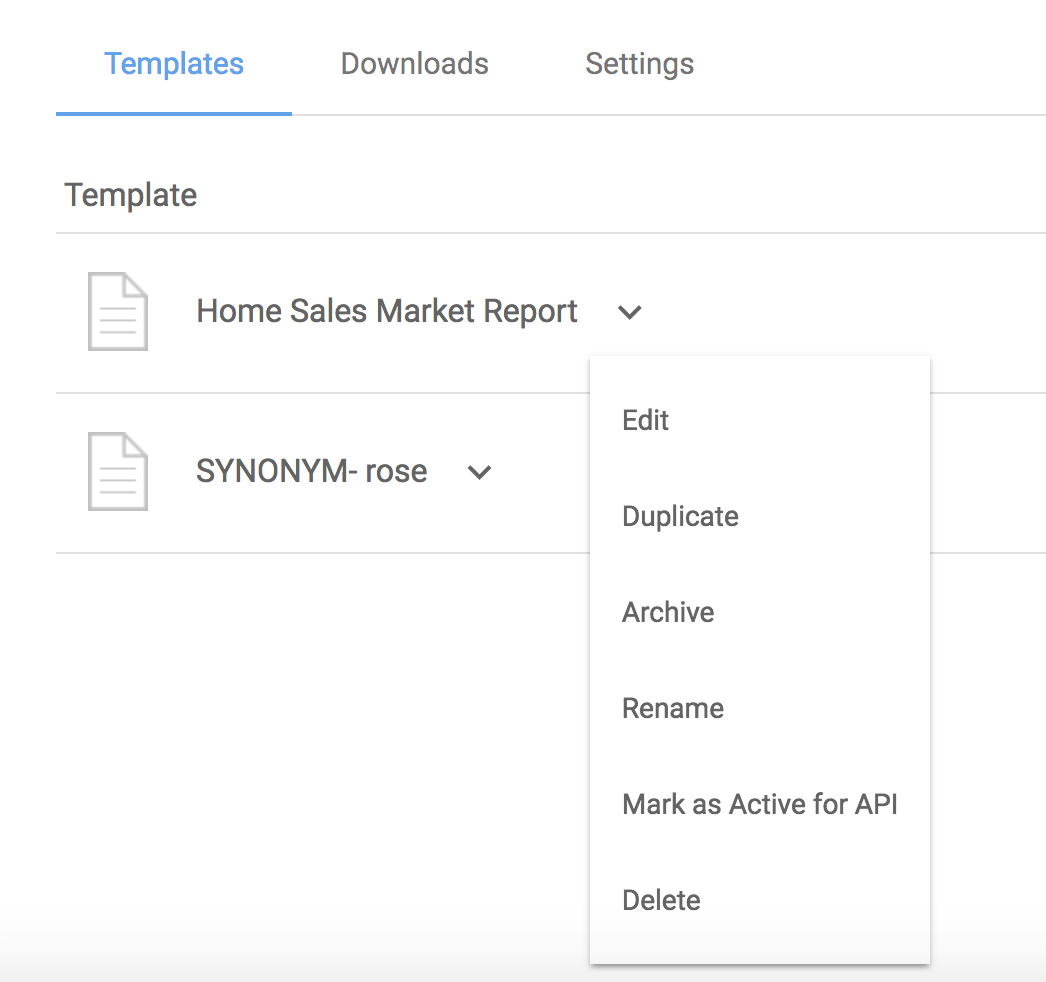
Create as many Templates as you want within a Project. Archive and delete them to stay organized. Just click the drop-down list next to the Template name to see all the actions you can take.
Edit
To make any changes to your Template, either click on the name of the Template or select 'Edit' from the drop-down list. This will take you to the Template Editor.
Duplicate
Use the "Duplicate" button to copy an entire Template you've created, including all Data Variables and Branches within it. Just make sure you give your new Template a name, the "Duplicate" button will not do that automatically.
Archive
Archiving a Template will just hide it from your main view, but you can always access Archived Templates by clicking the box next to "Show Archived" on your Project page. You can archive Templates you may not need as frequently, but don't want to completely remove from your account.
Rename
You can give your Template a name or change the name it currently has. It's best practice to name all of your Templates so you can easily distinguish between them. If you're using the Wordsmith API, changing the name of a Template will change the Template slug. So make sure to update your code with the new Template name.
Lock
Lock a Template to prevent any edits being made to it. Only Admin users have the ability to lock and unlock a Template. If you need to edit a locked Template, an Admin will need to unlock it before you're able to open it and make changes.
Mark as Active for API
If you're using the Wordsmith API, you'll need to specify which Project and Template you want your narrative generated from. You can either include the name of the Template in that request, or you can just indicate the "Active" Template. Using the "Active" Template means that Wordsmith users can create different versions of their Templates within a Project and have full control and flexibility over which Template they want the API to use without having to change any code. You can only have one 'Active' Template per Project. If you want to have more than one "Active" Template based on the same dataset, you can create a new Project.
Delete
Deleting a Template will remove it completely from your account. You won't be able to get the Template back, so make sure you no longer need that Template before deleting it.
Only one user can edit a Template at a time. If you have multiple team members working on the same Template, then you may see a notification that a Template is locked because someone is currently editing it. That means you'll have to wait for that user to exit out of the Template Editor before you can open the Template and edit yourself. Or you can share Templates across a Project so that more team members can collaborate on the same Project.
Data
Update data
Upload a new spreadsheet to your Project by clicking the 'Update Data File' button. If you have added any new columns, you'll see those listed as Data Variables in your Template. And if you've changed or removed columns, any affected Branches will be highlighted in red so you can easily see what you need to revise in your Template.
Change data types
Wordsmith will look at the first couple of rows from your CSV file, and determine whether your data is number, text, list, date, or true/false data. These distinctions affect the formatting options you have and the functions you can use for that data, so it's important that they are categorized correctly.
You can change how all of your data is classified by going to your Project page.
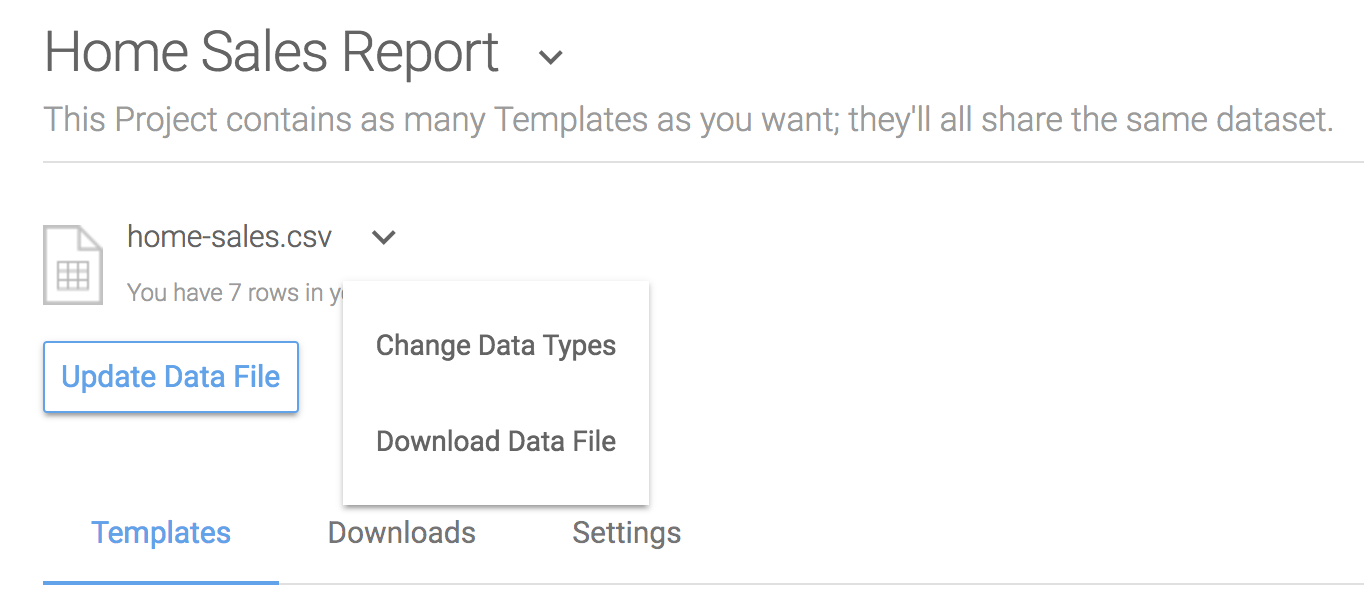
Right next to the name of your CSV file, use the drop-down list to choose 'Change Data Types'. Once you've done that, you'll be taken to the page below, where you can change the Type in the middle column. When you're done, click "Save Types", and open up your Template again. The data type should be updated and you'll have different formatting options available.
Download Data File
You can also download the CSV file you originally uploaded to that Project. Other team members who don't have the data file can access it and make any changes or add columns as needed.
Downloads
If you have downloaded any narratives from a particular Template in that Project, you'll see those on the 'Downloads' tab. Each download will include the name of the Template that was used, the number of narratives created, and which team member downloaded them.
You can click on the download to re-download the narratives that were created at any time.
Settings
After you select a Project, you'll be able to access your Project settings. The setting tab will allow you to adjust the behavior of your Project and templates. Settings are unique to each Project, so you can adjust each Project accordingly.
Enable A/An Autocorrect
This option is on by default for every Project. While this is enabled, Wordsmith will automatically correct incorrect usage of a/an (ie, "I have a apple") when possible. If you are writing content in any language other than English, we would suggest disabling this option.
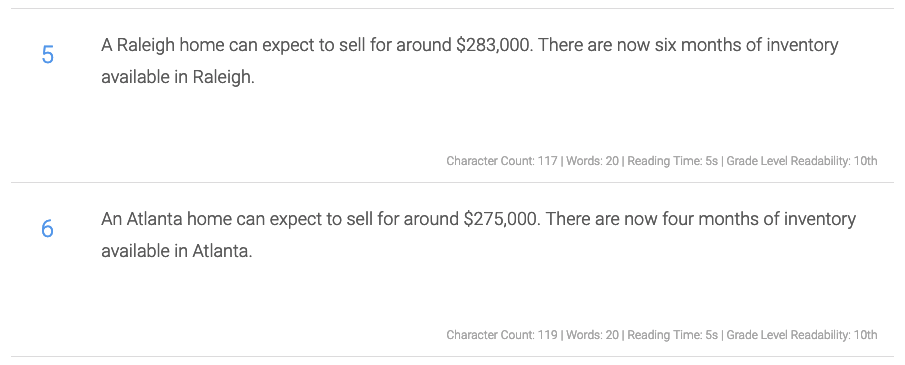
Here you can see the template automatically corrects "A" to "An" for Atlanta homes.
Apply Formatting Preferences
This option is off by default for every Project. If you enable this option, Wordsmith will automatically apply your previous formatting preferences for each data type when inserting a new Data Variable into your Template. For example, if you last formatted a Number Data Variable to show 2 decimal places, the next time you insert a Number Data Variable, you'll see it's automatically formatted to also show 2 decimal places.
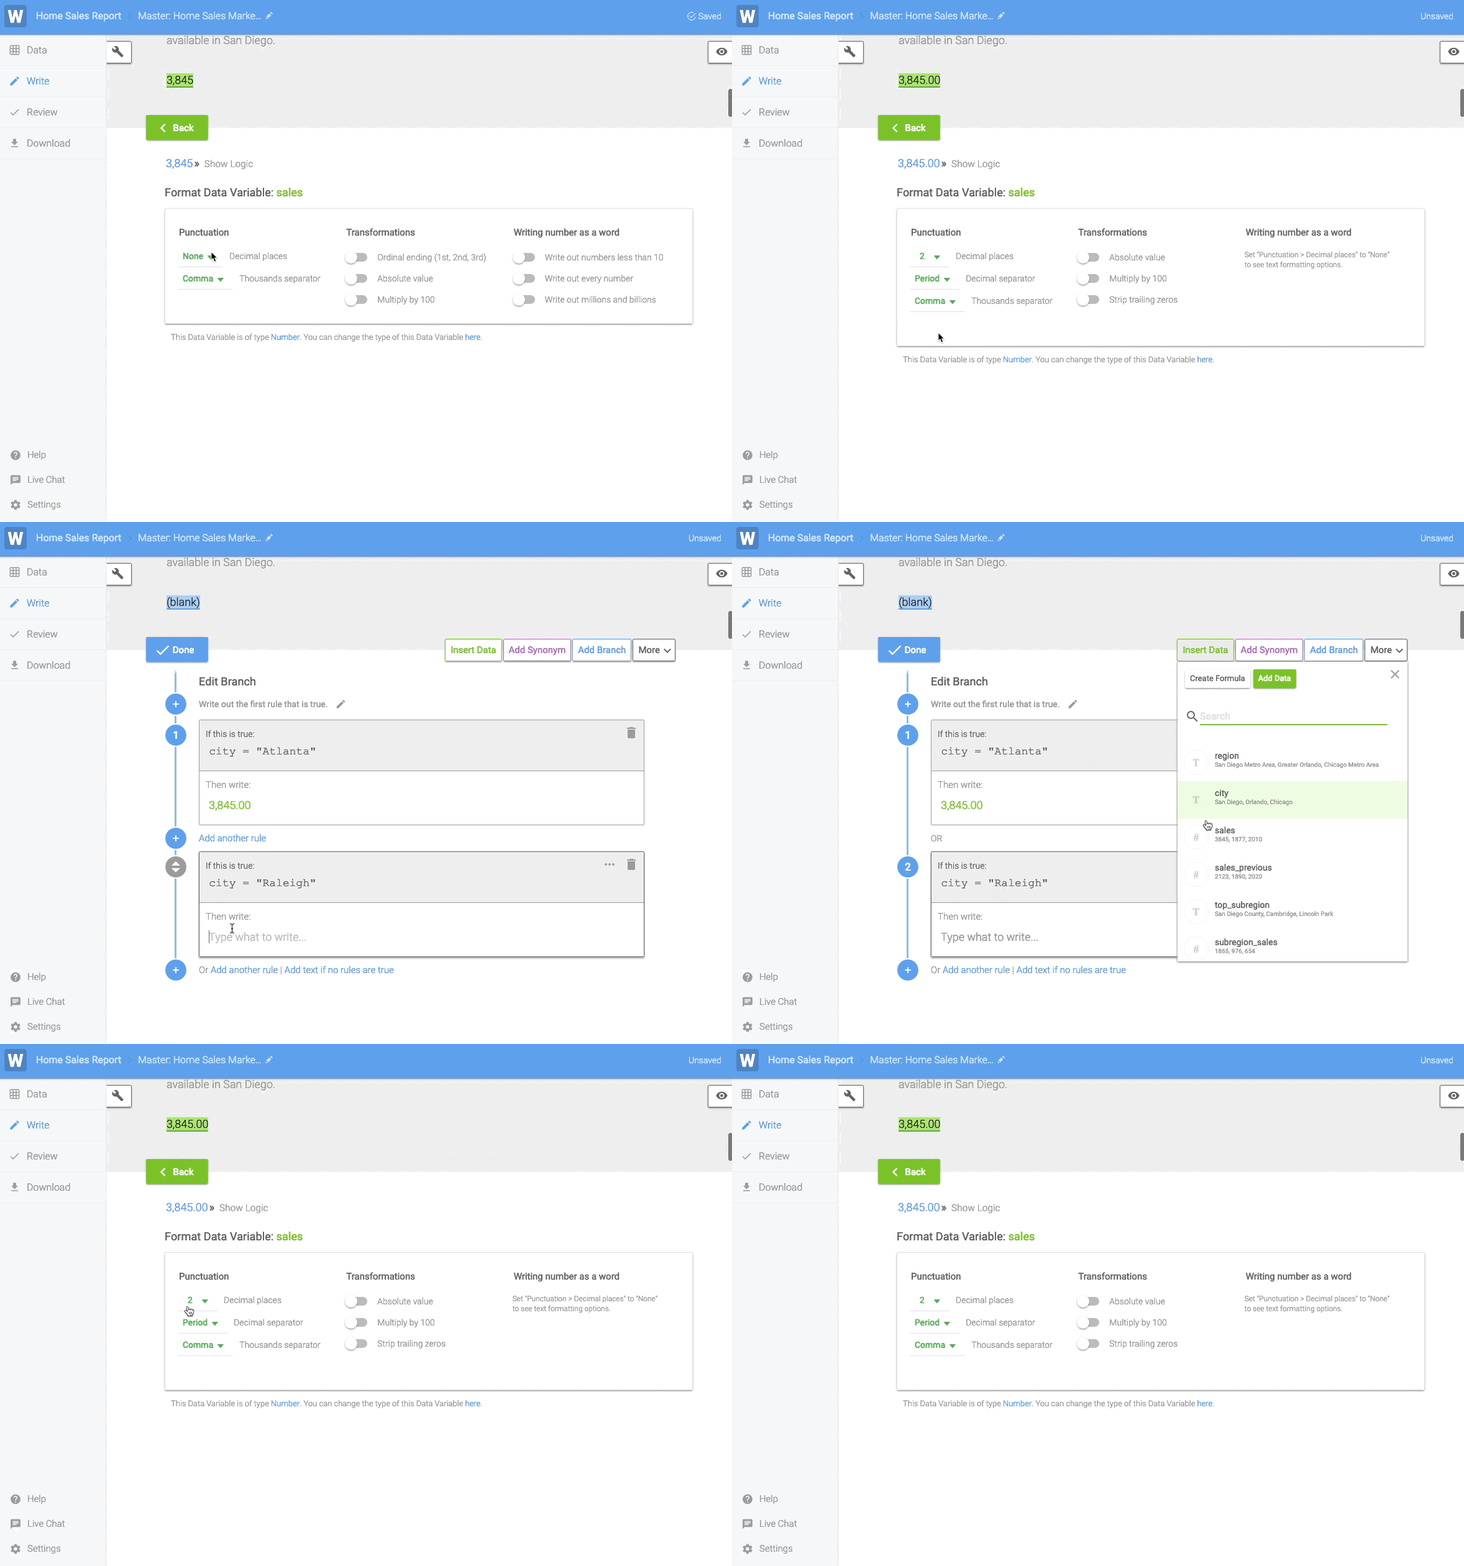
API Set To
This option allows users to point to either the current version of a Project or a read-only Snapshot of their Project when using the API. Pointing to a Snapshot allows you to continue making modifications to the working version of the Project without affecting the narratives being generated in production.
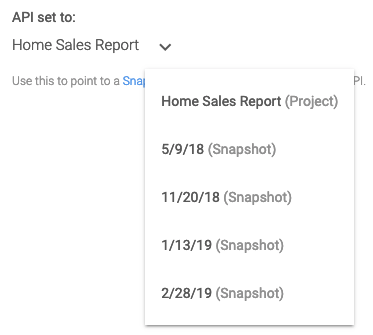
You can select the Snapshot you want to use from the dropdown menu.
Updated over 6 years ago
