Setting up the Wordsmith Integration
Setting up your Wordsmith integration is a little different depending on your version of Tableau. Extensions were rolled out in the Tableau version 2018.2 release. So if you're on 2018.2 or later, you can use the Wordsmith Extension to pull narrative into your dashboard as an object. If you're on an earlier version of Tableau, you'll set up the integration in Wordsmith.
How It Works
Wordsmith is a natural language generation platform that allows you to write about your data. You'll use the data from the worksheets in Tableau to pull out text insights that help your viewers learn more about the dashboard. The worksheets in your Tableau dashboards will be data tables in Wordsmith that you'll query to pull out insights. And you'll use that data in a Wordsmith Template. The Template is how you customize what insights you want to write as the data changes or viewers interact with the dashboard.
Tableau Version 2018.2 or later
The Wordsmith Extension in Tableau allows you to pull narrative directly inside your Tableau dashboard. As you're creating visualizations of your data, you can simultaneously design text insights using Wordsmith. The Wordsmith extension works wherever Tableau has enabled Extensions - so you can use it in Desktop or Online and publish to Server. But Extensions aren't yet available in Tableau Public.
Download the Wordsmith extension here.
Unzip this download and make sure that the file you're using in the dashboard is .trex.
Navigate the Wordsmith Extension
Refresh Narrative
Refresh the narrative to pull in any changes you've made to your Template and see the latest version of your text.
Edit Wordsmith Template
This is where you'll write the calcs to pull out data from your Tableau worksheets and where you'll use that data to write your narrative. A Template is like a decision tree that allows you to change your text as the data in your dashboard changes. You can also navigate directly to your Template and Calcs in your Wordsmith account.
Edit Integration
The integration is how Wordsmith and Tableau connect. This is where you'll add worksheets from your Tableau dashboard to be used in Wordsmith.
Set Up the Wordsmith Extension
Wordsmith Extension Update - September 2, 2019:
The Wordsmith for Tableau extension no longer requires an API Key when setting up your integration. Integrations are now validated by entering the email address and password associated with your Wordsmith account.
Note: The first time you edit an integration that has an existing connection, you will be required to enter the username and password associated with the existing API key integration to "upgrade" to the new workflow.
1. Add the Wordsmith extension to your Tableau dashboard
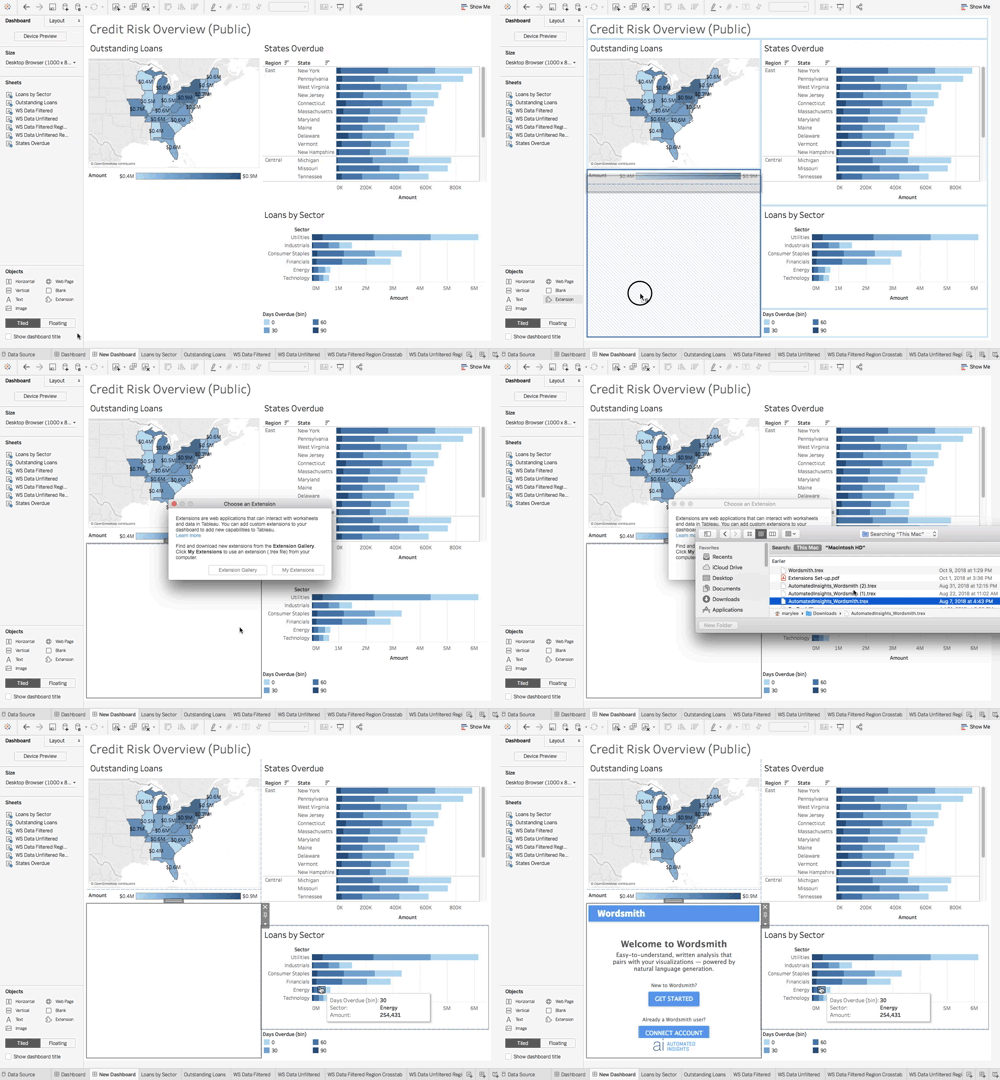
Drag the Extensions object onto your Dashboard and select My Extensions from the pop-up window. Then select the Wordsmith .trex file from wherever it's saved on your computer.
2. Connect to your Wordsmith account
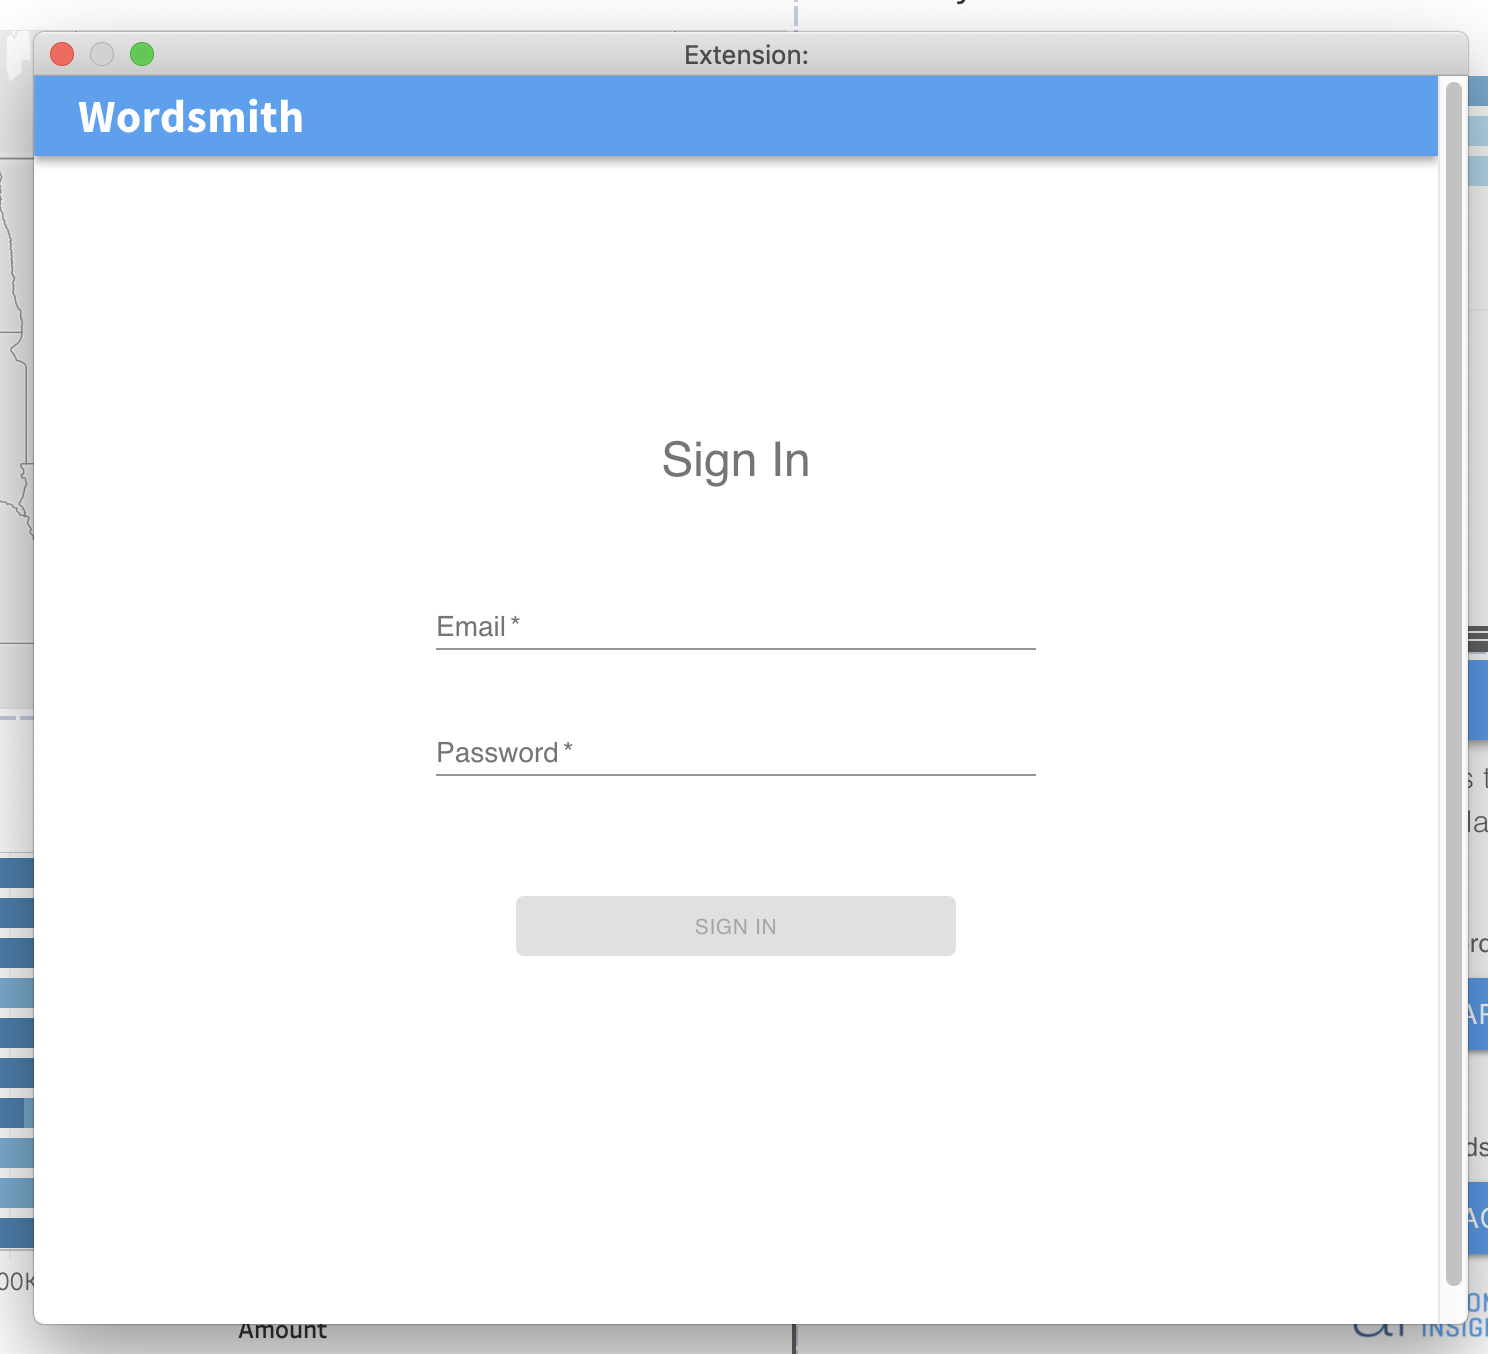
Click Connect Account to open the integration login page. Enter your Wordsmith login credentials (email and password) and click Sign In.
3. Name integration and select worksheets from the dashboard to pull into Wordsmith
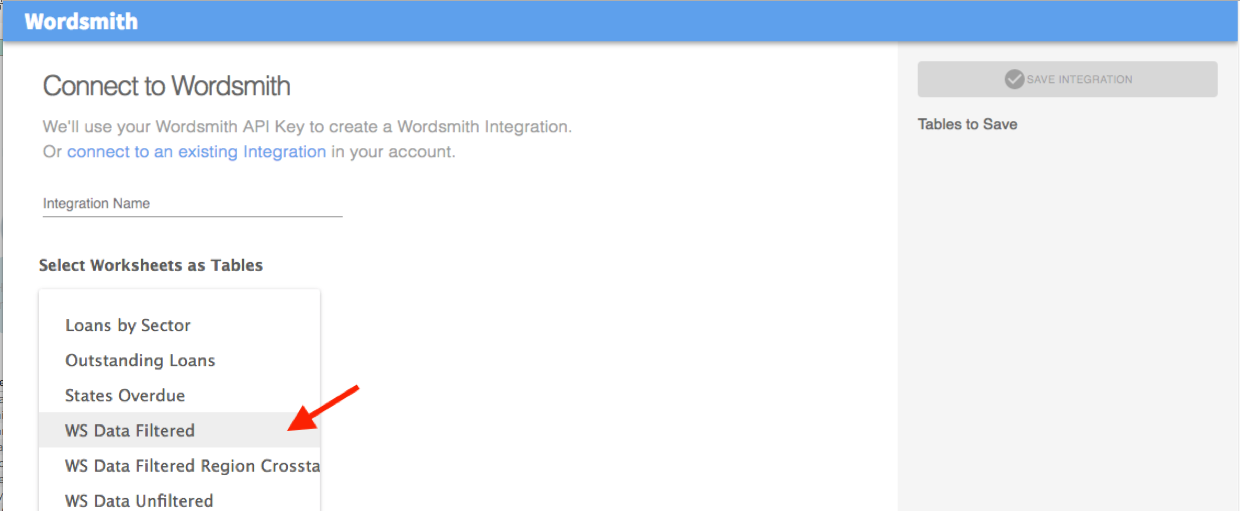
Give your integration a meaningful name, then use the drop-down list to view all the worksheets in your dashboard. Select those worksheets to pull them into Wordsmith and click Save Integration.
Connect to an Existing Integration
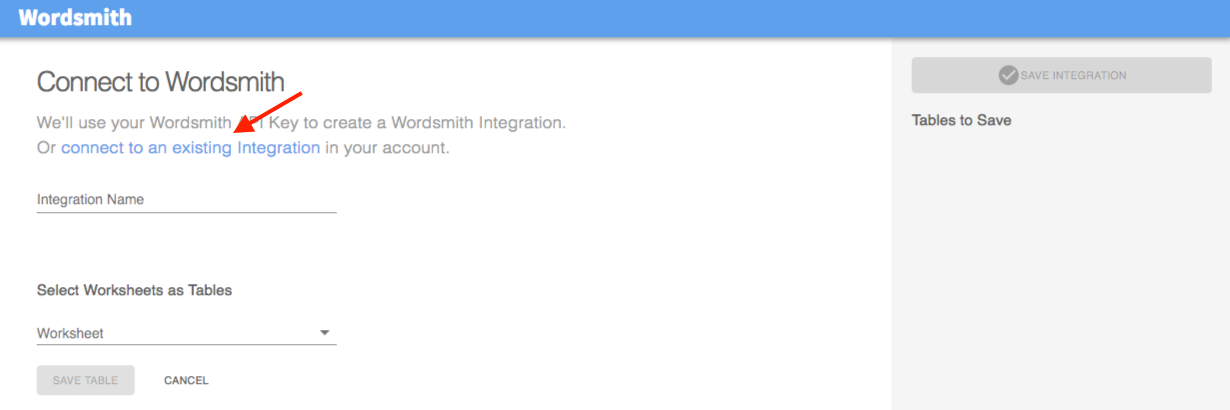
If you want to use a project you've already created, select 'connect to an existing Integration' on the integration page. You will then select one of the existing integration projects in your account from the dropdown menu. Make sure all of the worksheets in the Tableau dashboard are the same as the tables in the Wordsmith project. If the data tables have changed, the calcs in your project won't work.
Edit an Existing Integration
If you want to edit an existing integration, click the three dots in the upper right corner of the Wordsmith extension box and select Edit Integration. Add or remove tables and click Save Integration to save your changes.
You may be prompted to validate your session. Simply enter your Wordsmith password to continue.
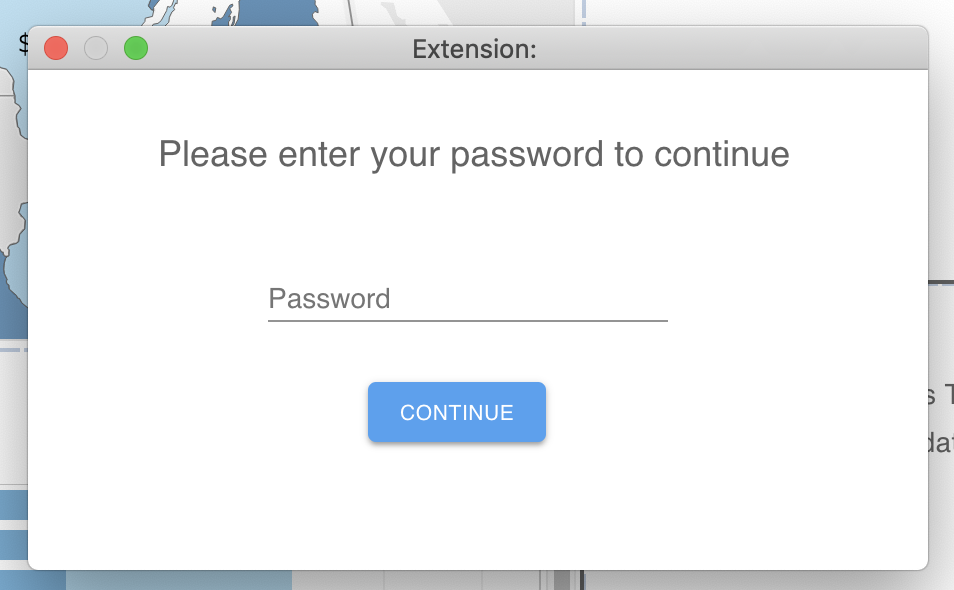
Tableau Version 2018.1 or earlier
The Wordsmith integration is also available for anyone on earlier versions of Tableau. The integration allows you to pull your Tableau dashboard into Wordsmith and populate narrative alongside it.
Navigate the Integration
Connect
The integration page is where you'll see how Wordsmith is connecting to Tableau. You'll pull in the worksheets you want to use in Wordsmith.
Calculate
Once you add worksheets from Tableau, you'll see them as data tables on the Calculate page. You'll write calcs, which are just a series of functions performed on the tables, to pull out data points you care about.
Write
This is where you'll write your Template. Once you have the data points you need, you'll use them as data variables in a Template. A Template is like a decision tree that allows you to change your text as the data in your dashboard changes.
Visualize
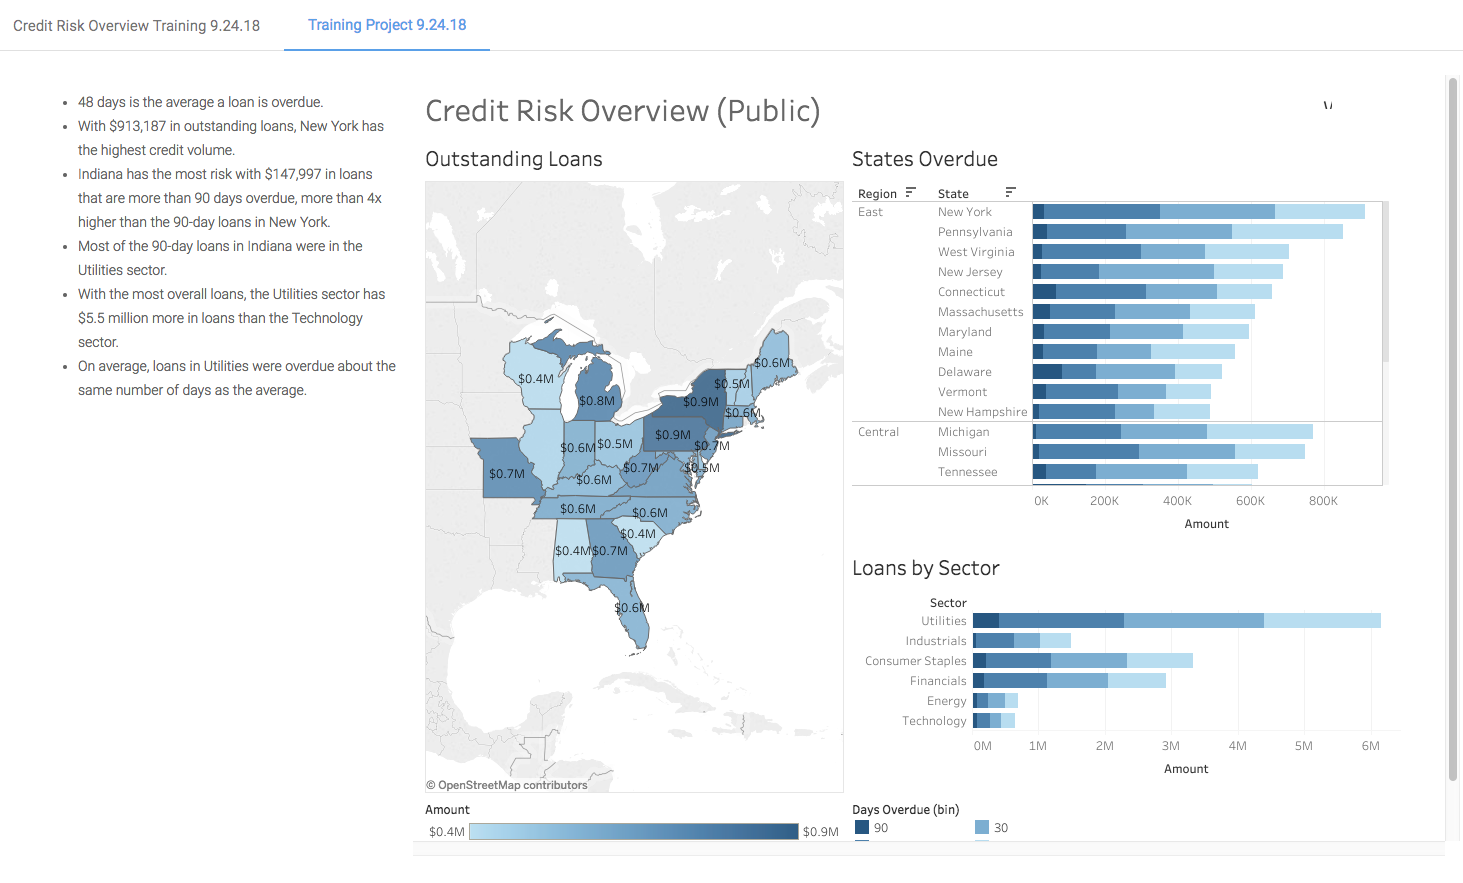
See your text insights alongside your Tableau dashboard. Use the Share button in the top right of the page for an external URL to provide your dashboard viewers. If you have multiple tabs in your dashboard, you can create a URL with multiple integrations.
Set up the Integration
1. Connect to your Tableau dashboard
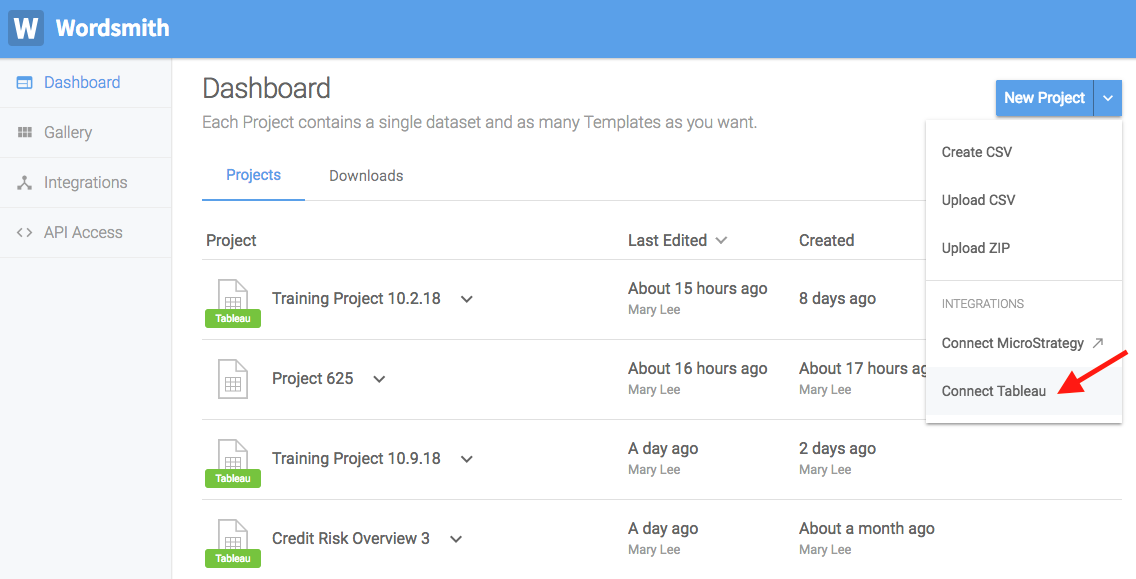
Click on the toggle for the New Project button in the top right of your Wordsmith account and select Connect Tableau.
**2. Copy the share URL from your Tableau dashboard
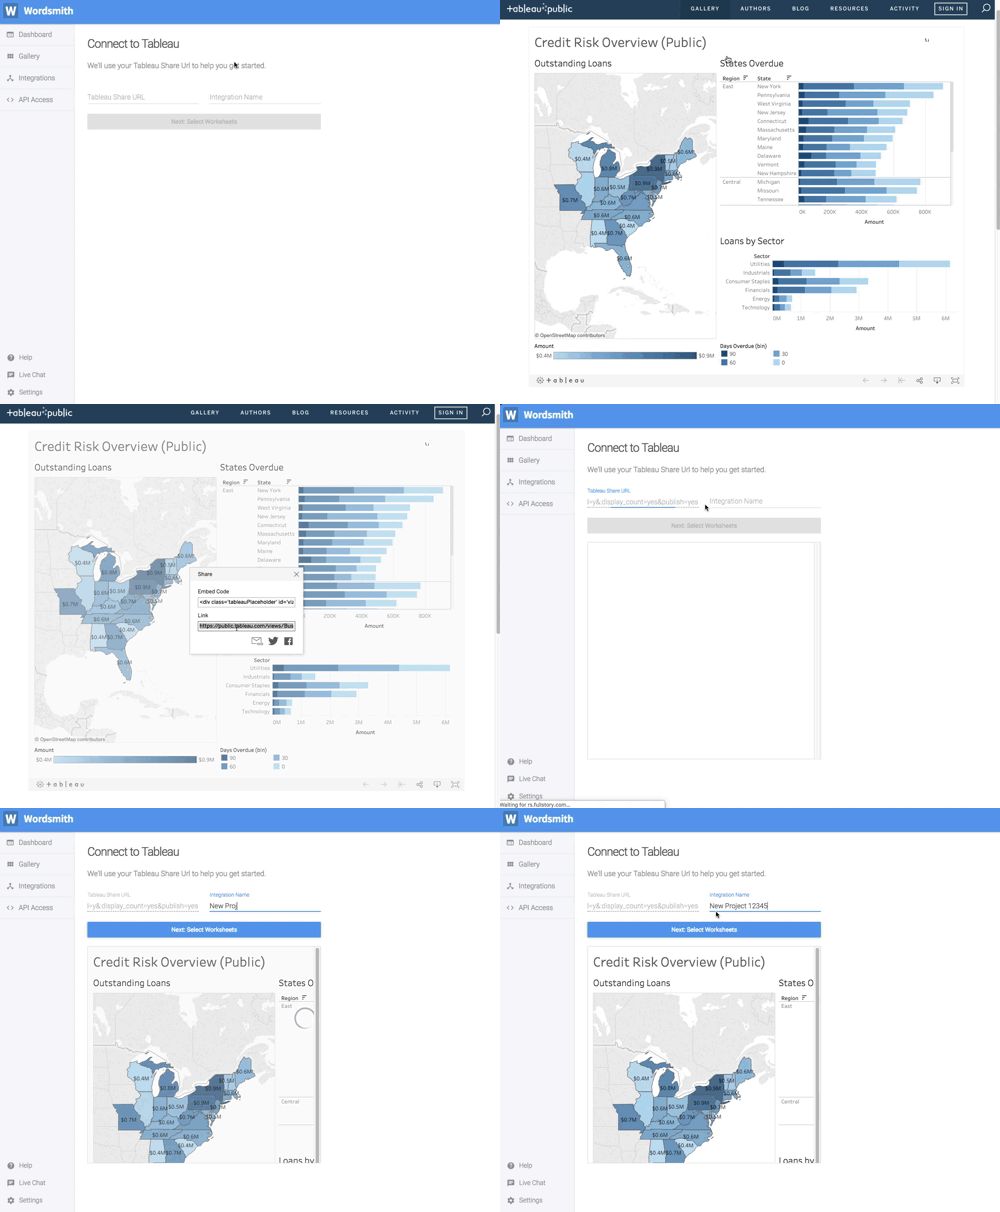
Click on the share icon in the bottom right corner of your dashboard and copy the URL in the Link box. Paste that URL into Wordsmith and give your integration a name.
**3. Select worksheets from the dashboard to pull into Wordsmith
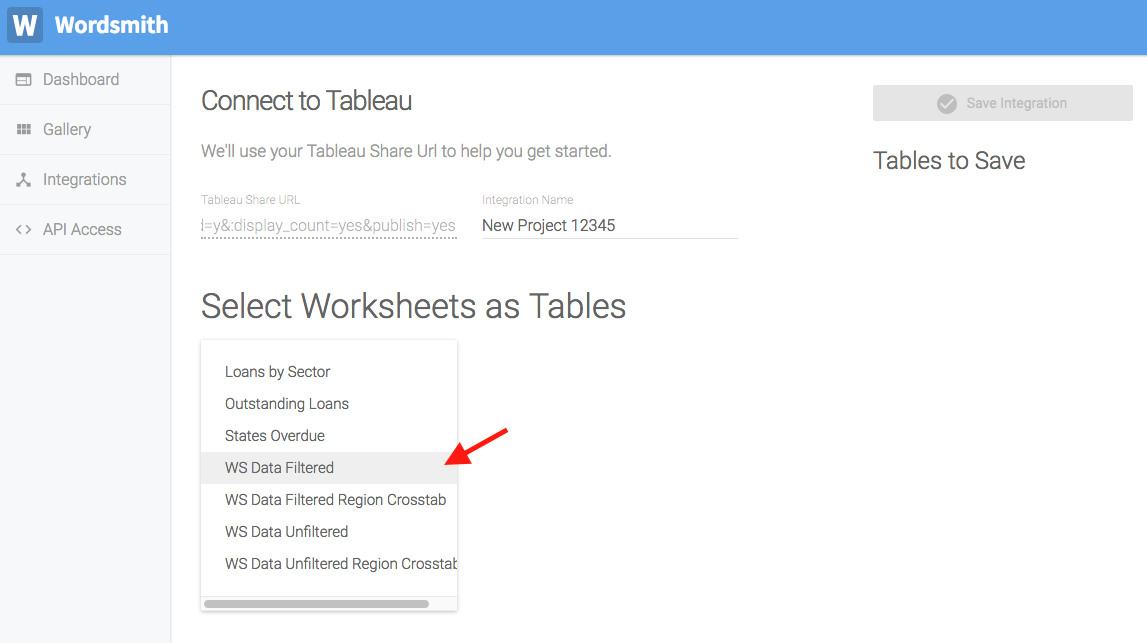
In the drop-down list, you can see all the worksheets in your dashboard. Select those worksheets to pull them into Wordsmith and click Save Integration.
Multiple Tabs in a Dashboard
If you have dashboard with multiple tabs, you can use the Share button on the Visualize page to add multiple integrations to the same URL. You'll see each integration as its own tab on the page.
Updated over 6 years ago
